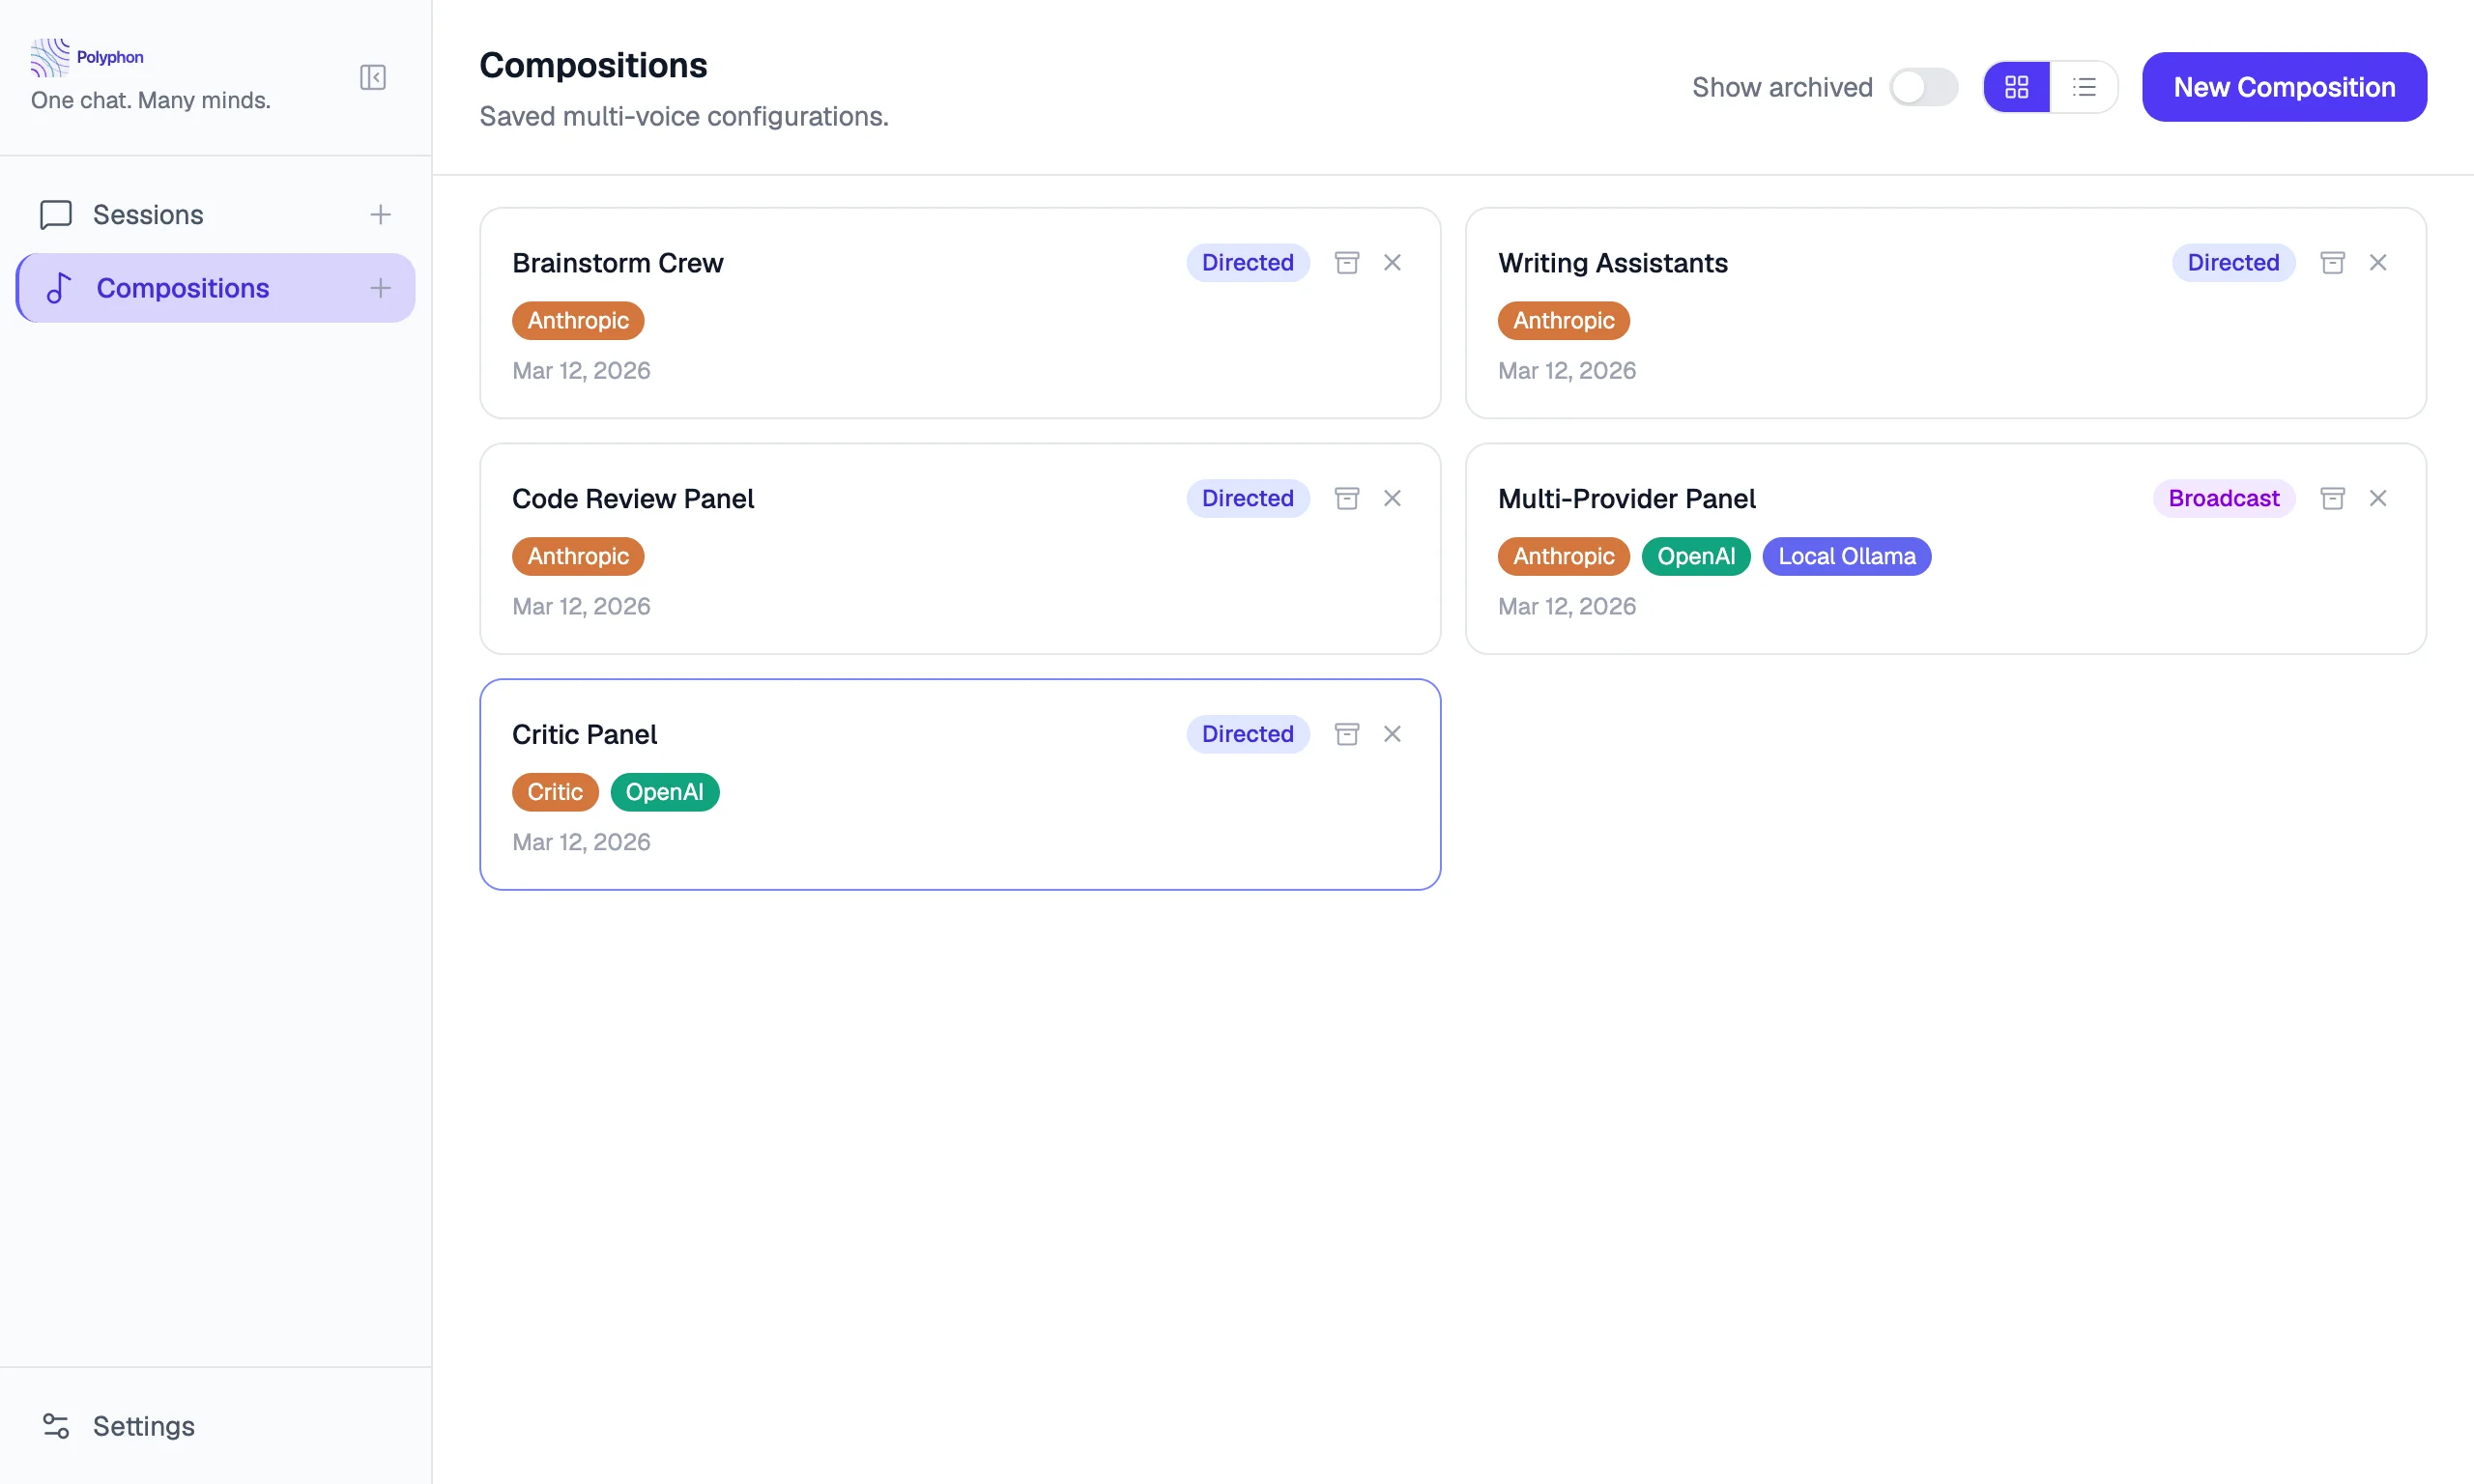
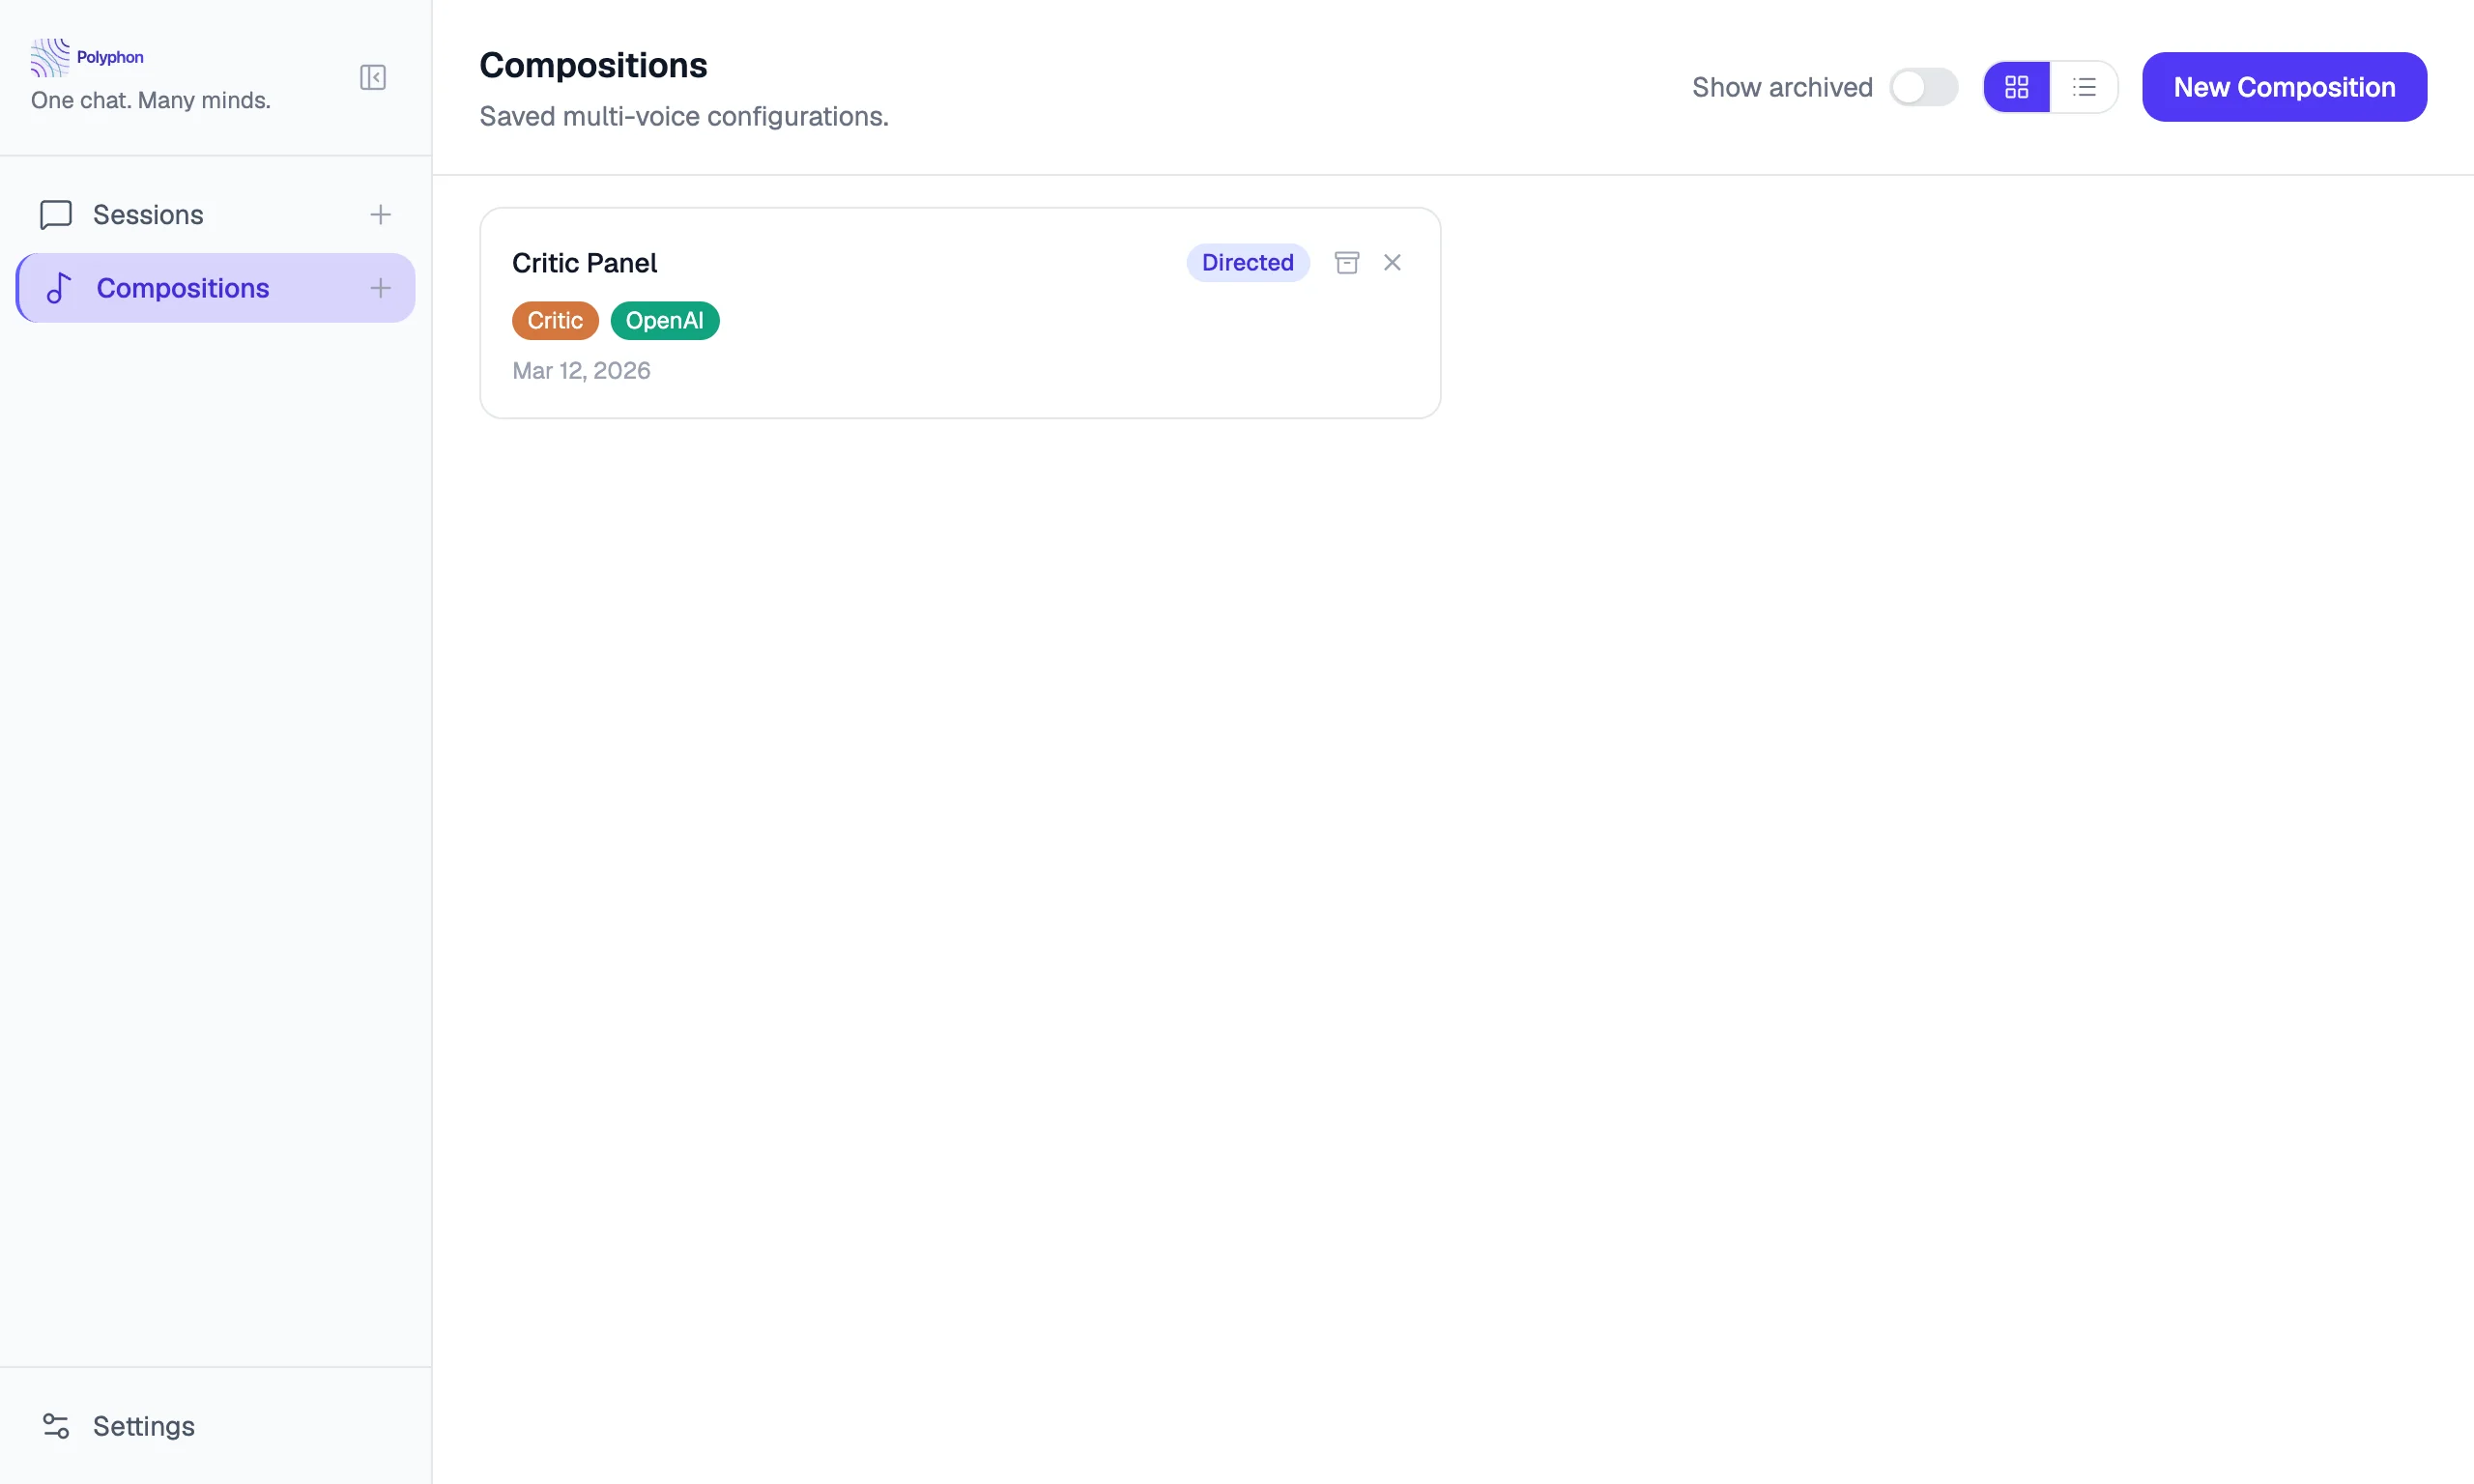
A composition is a saved, named configuration of voices. Create one to quickly launch consistent multi-voice sessions without reconfiguring voices each time.
Creating a Composition
Click the New Composition button in the sidebar (below the session list).
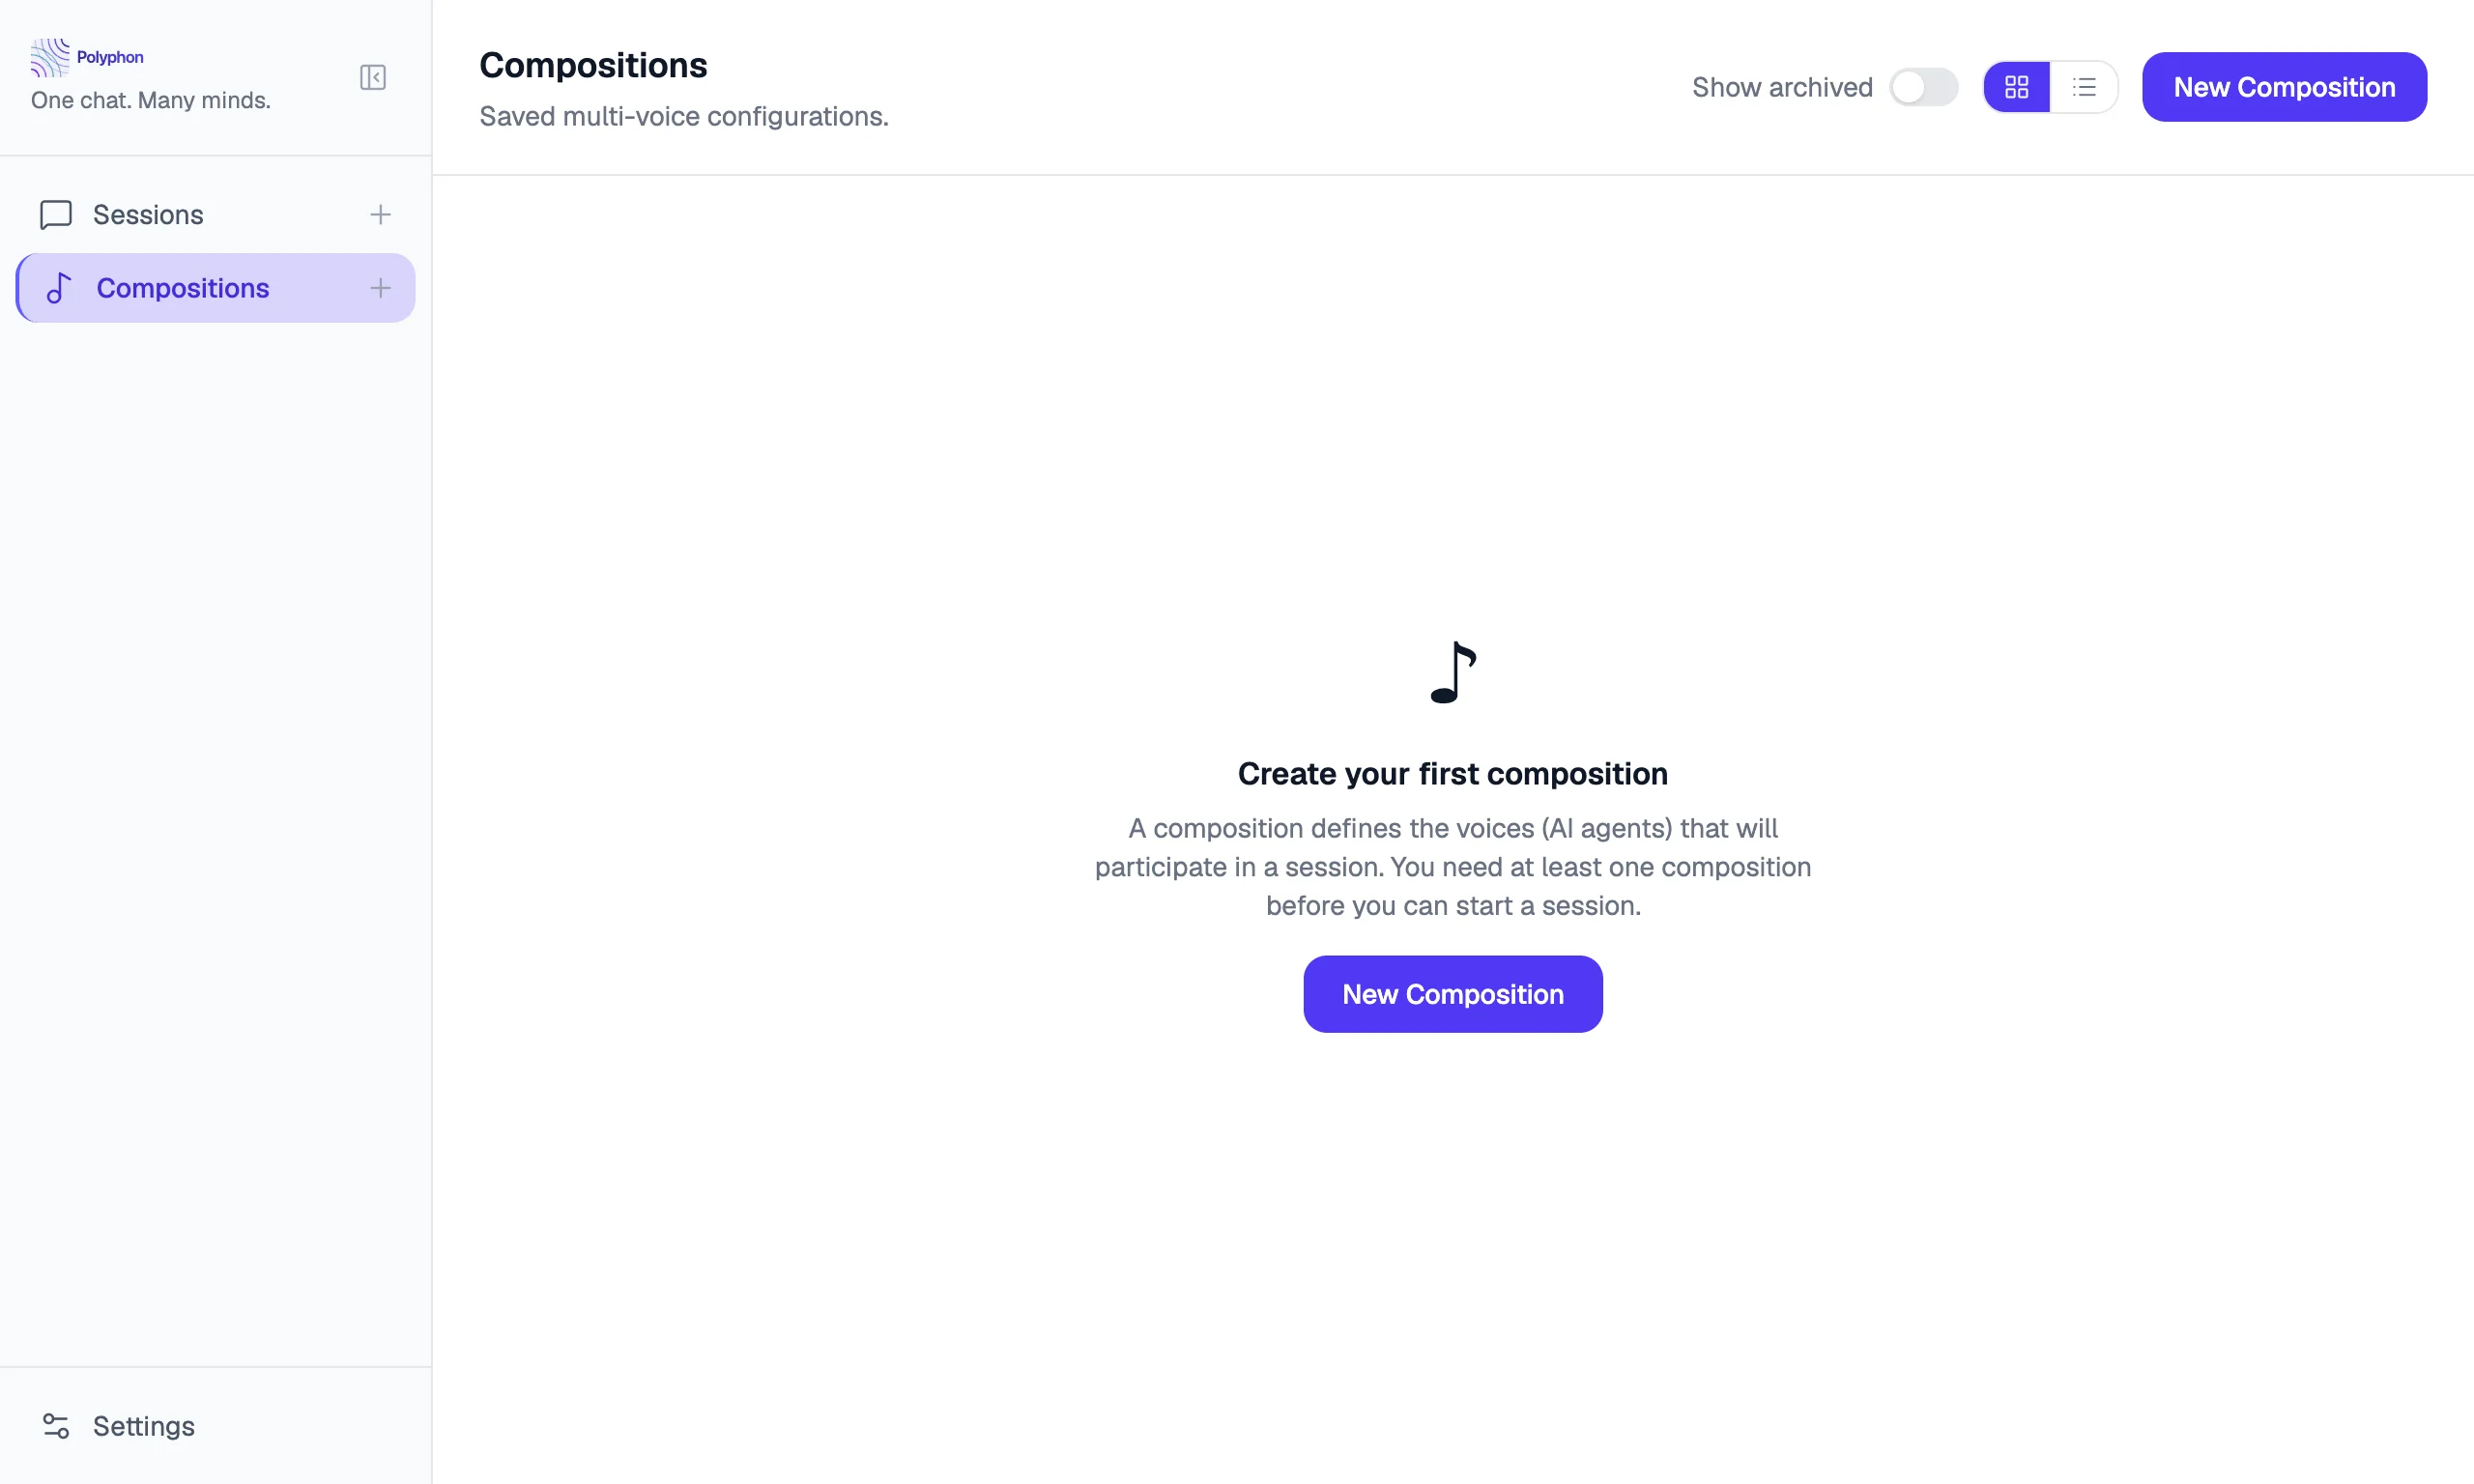
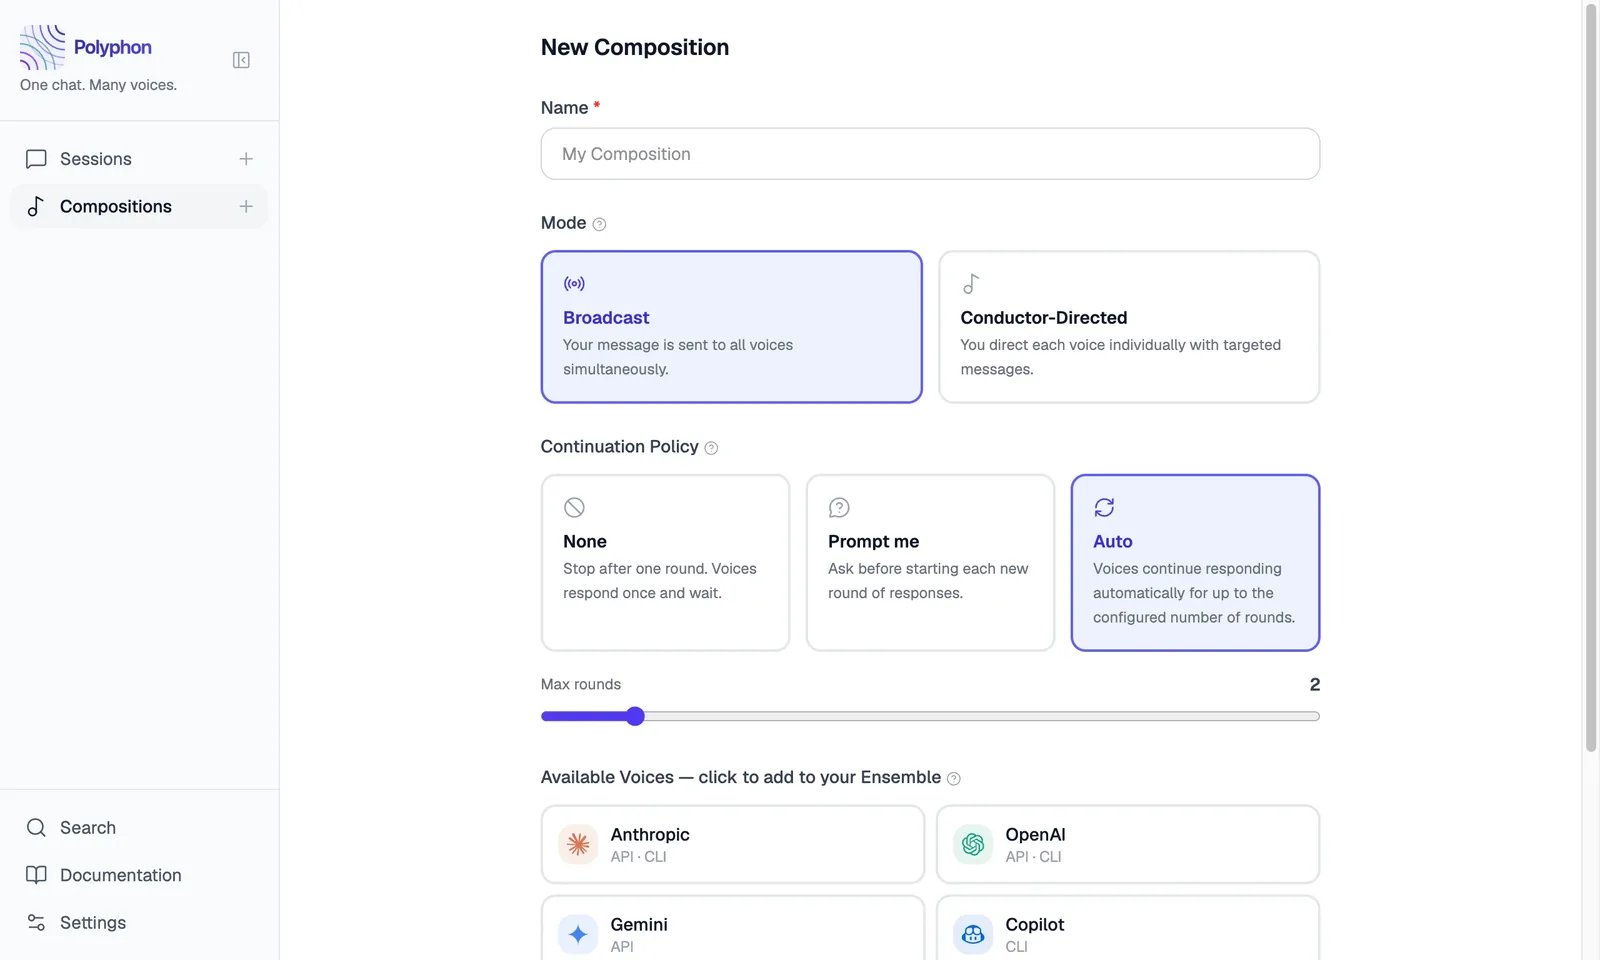
The composition builder opens. Give your composition a name, then add voices.
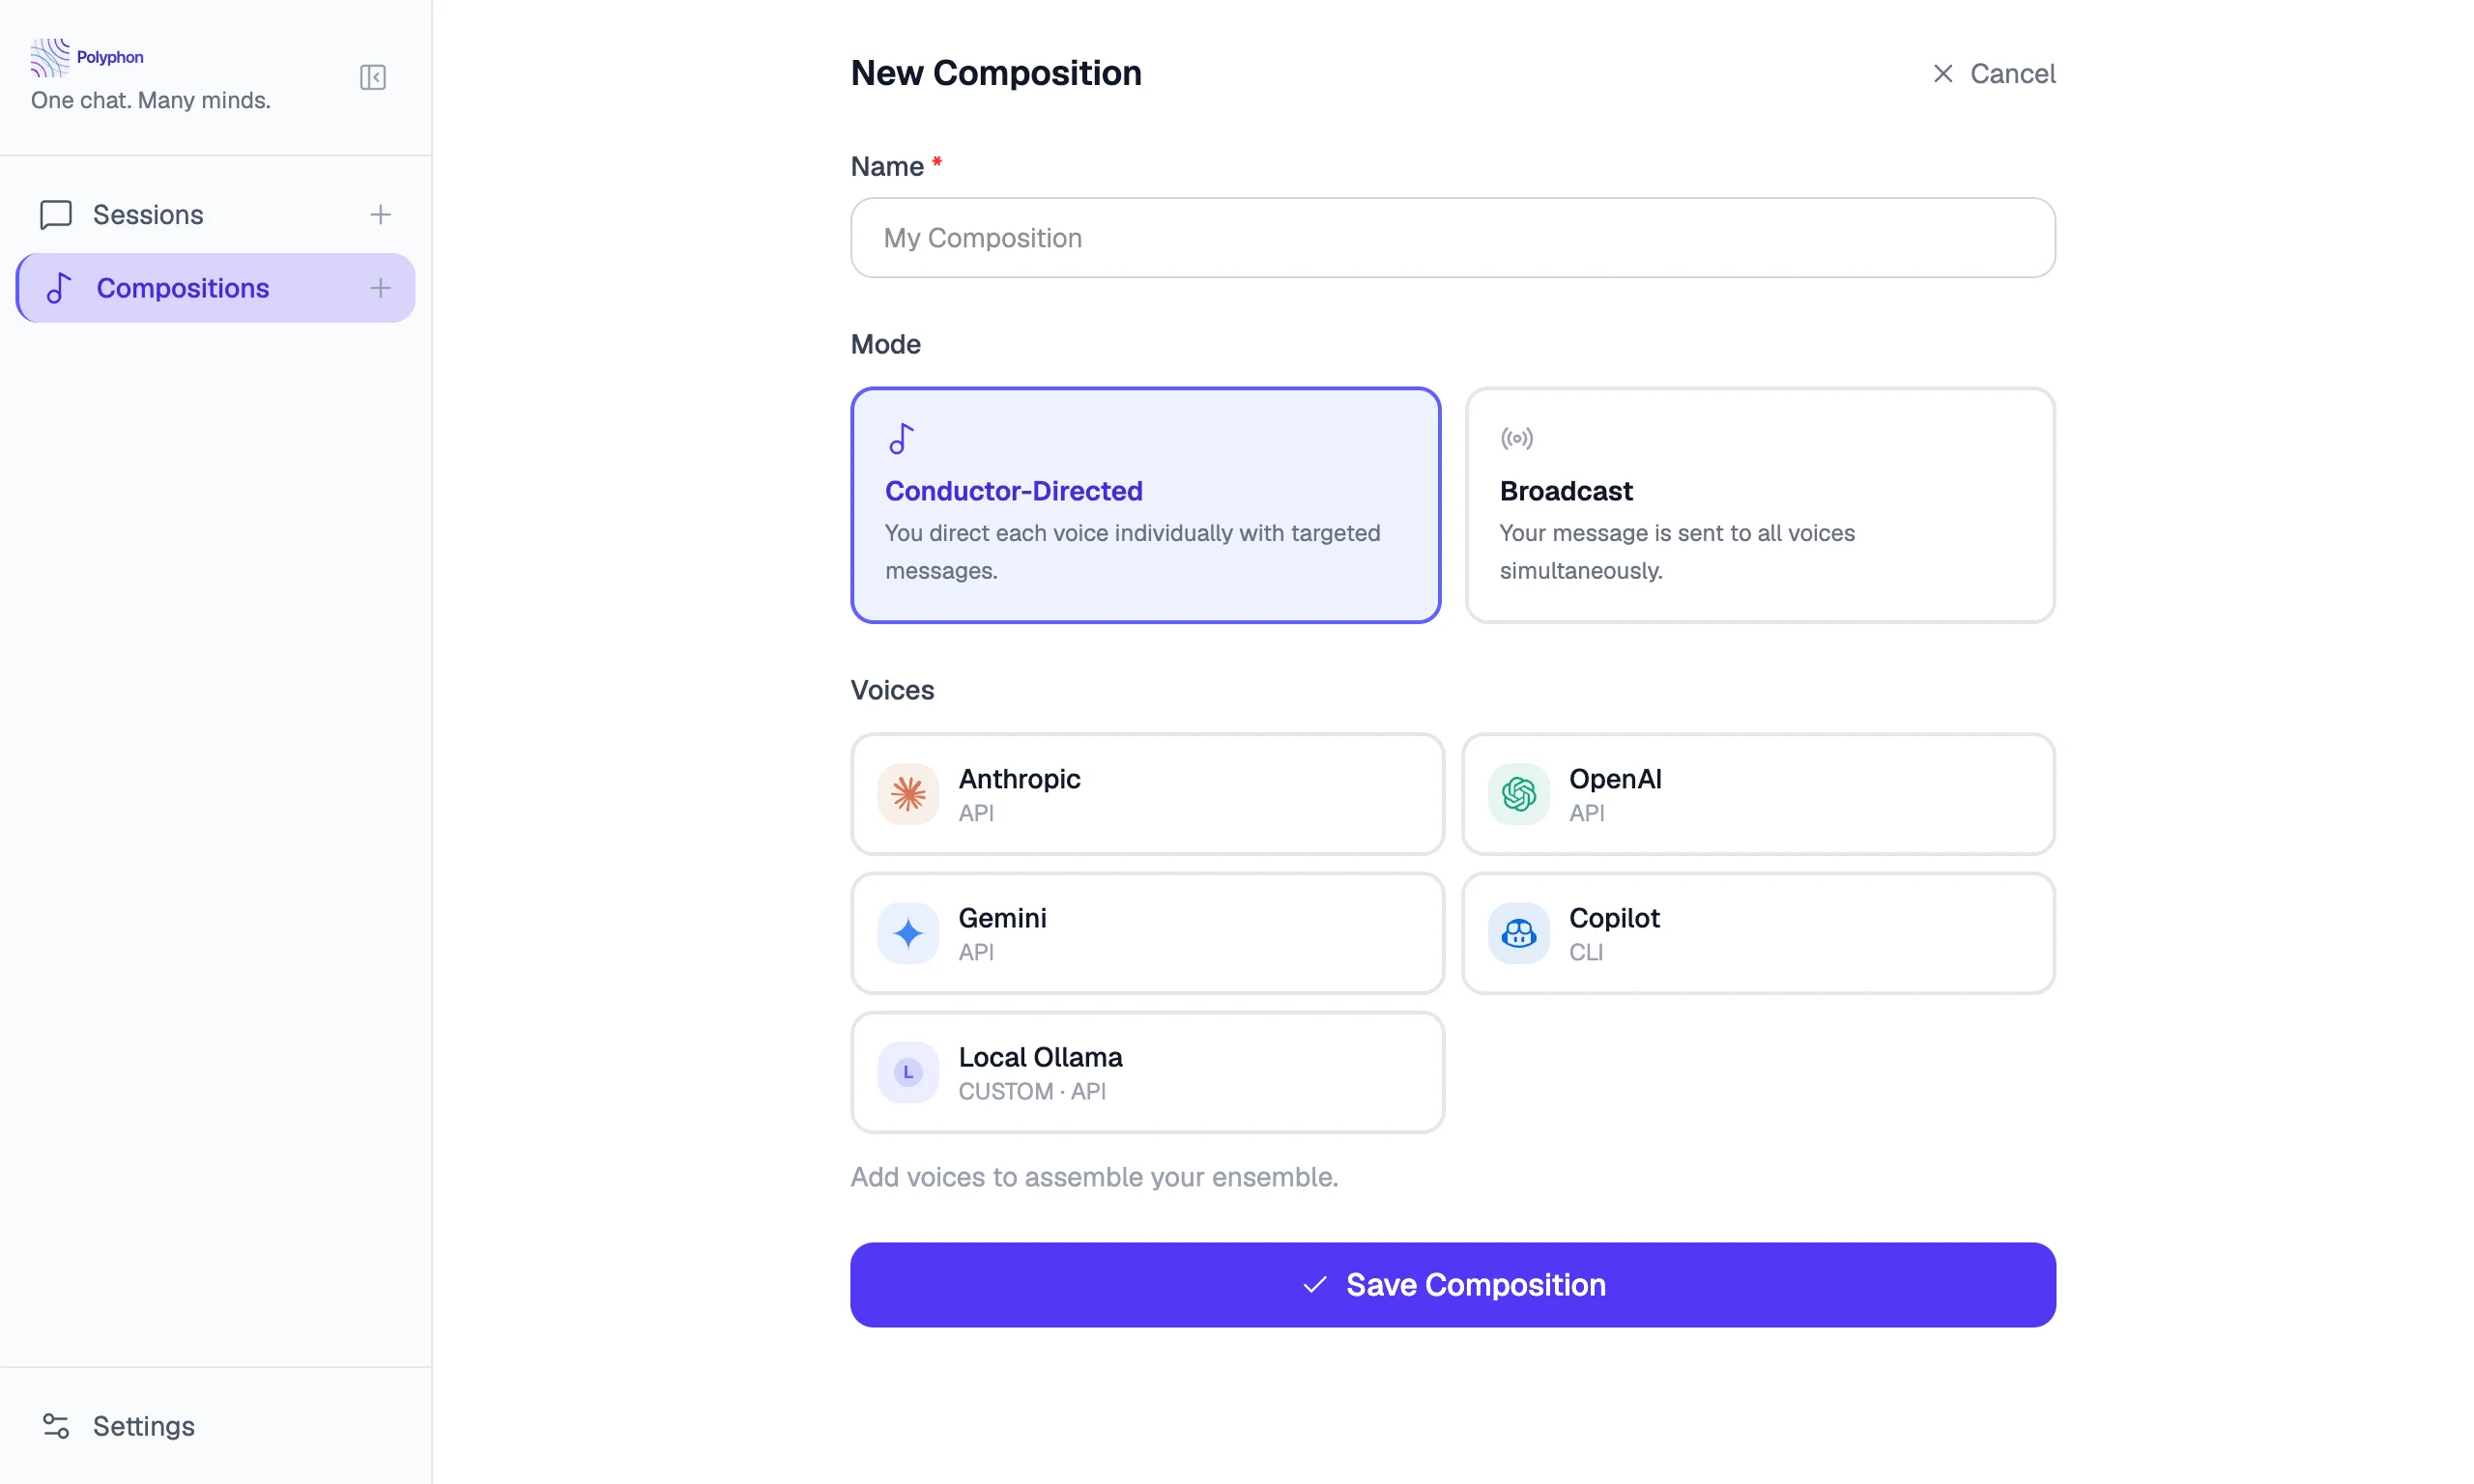
Choosing a Mode
The first setting in the Composition Builder is the session mode. This controls how your messages are dispatched when you start a session from this composition.
| Mode | Behavior |
|---|---|
| Conductor-Directed | You direct each message to a specific voice. Other voices see the exchange but stay silent. |
| Broadcast | Your message goes to all voices simultaneously. This is the default. |
The continuation policy (below) is only available in Broadcast mode.
Continuation Policy
When Broadcast mode is selected, the Continuation policy section appears below the mode selector. This controls what happens after the first round of responses completes.
| Policy | Behavior |
|---|---|
| None | Voices respond once and wait. No additional rounds start automatically. |
| Prompt me | After each round, a nudge banner appears in the session asking whether to continue. You click Allow or Dismiss. |
| Auto | Voices continue responding automatically until the max rounds limit is reached. |
When Auto is selected, a Max rounds slider appears (range 1–3). This caps the total number of automatic continuation rounds.
Adding Voices
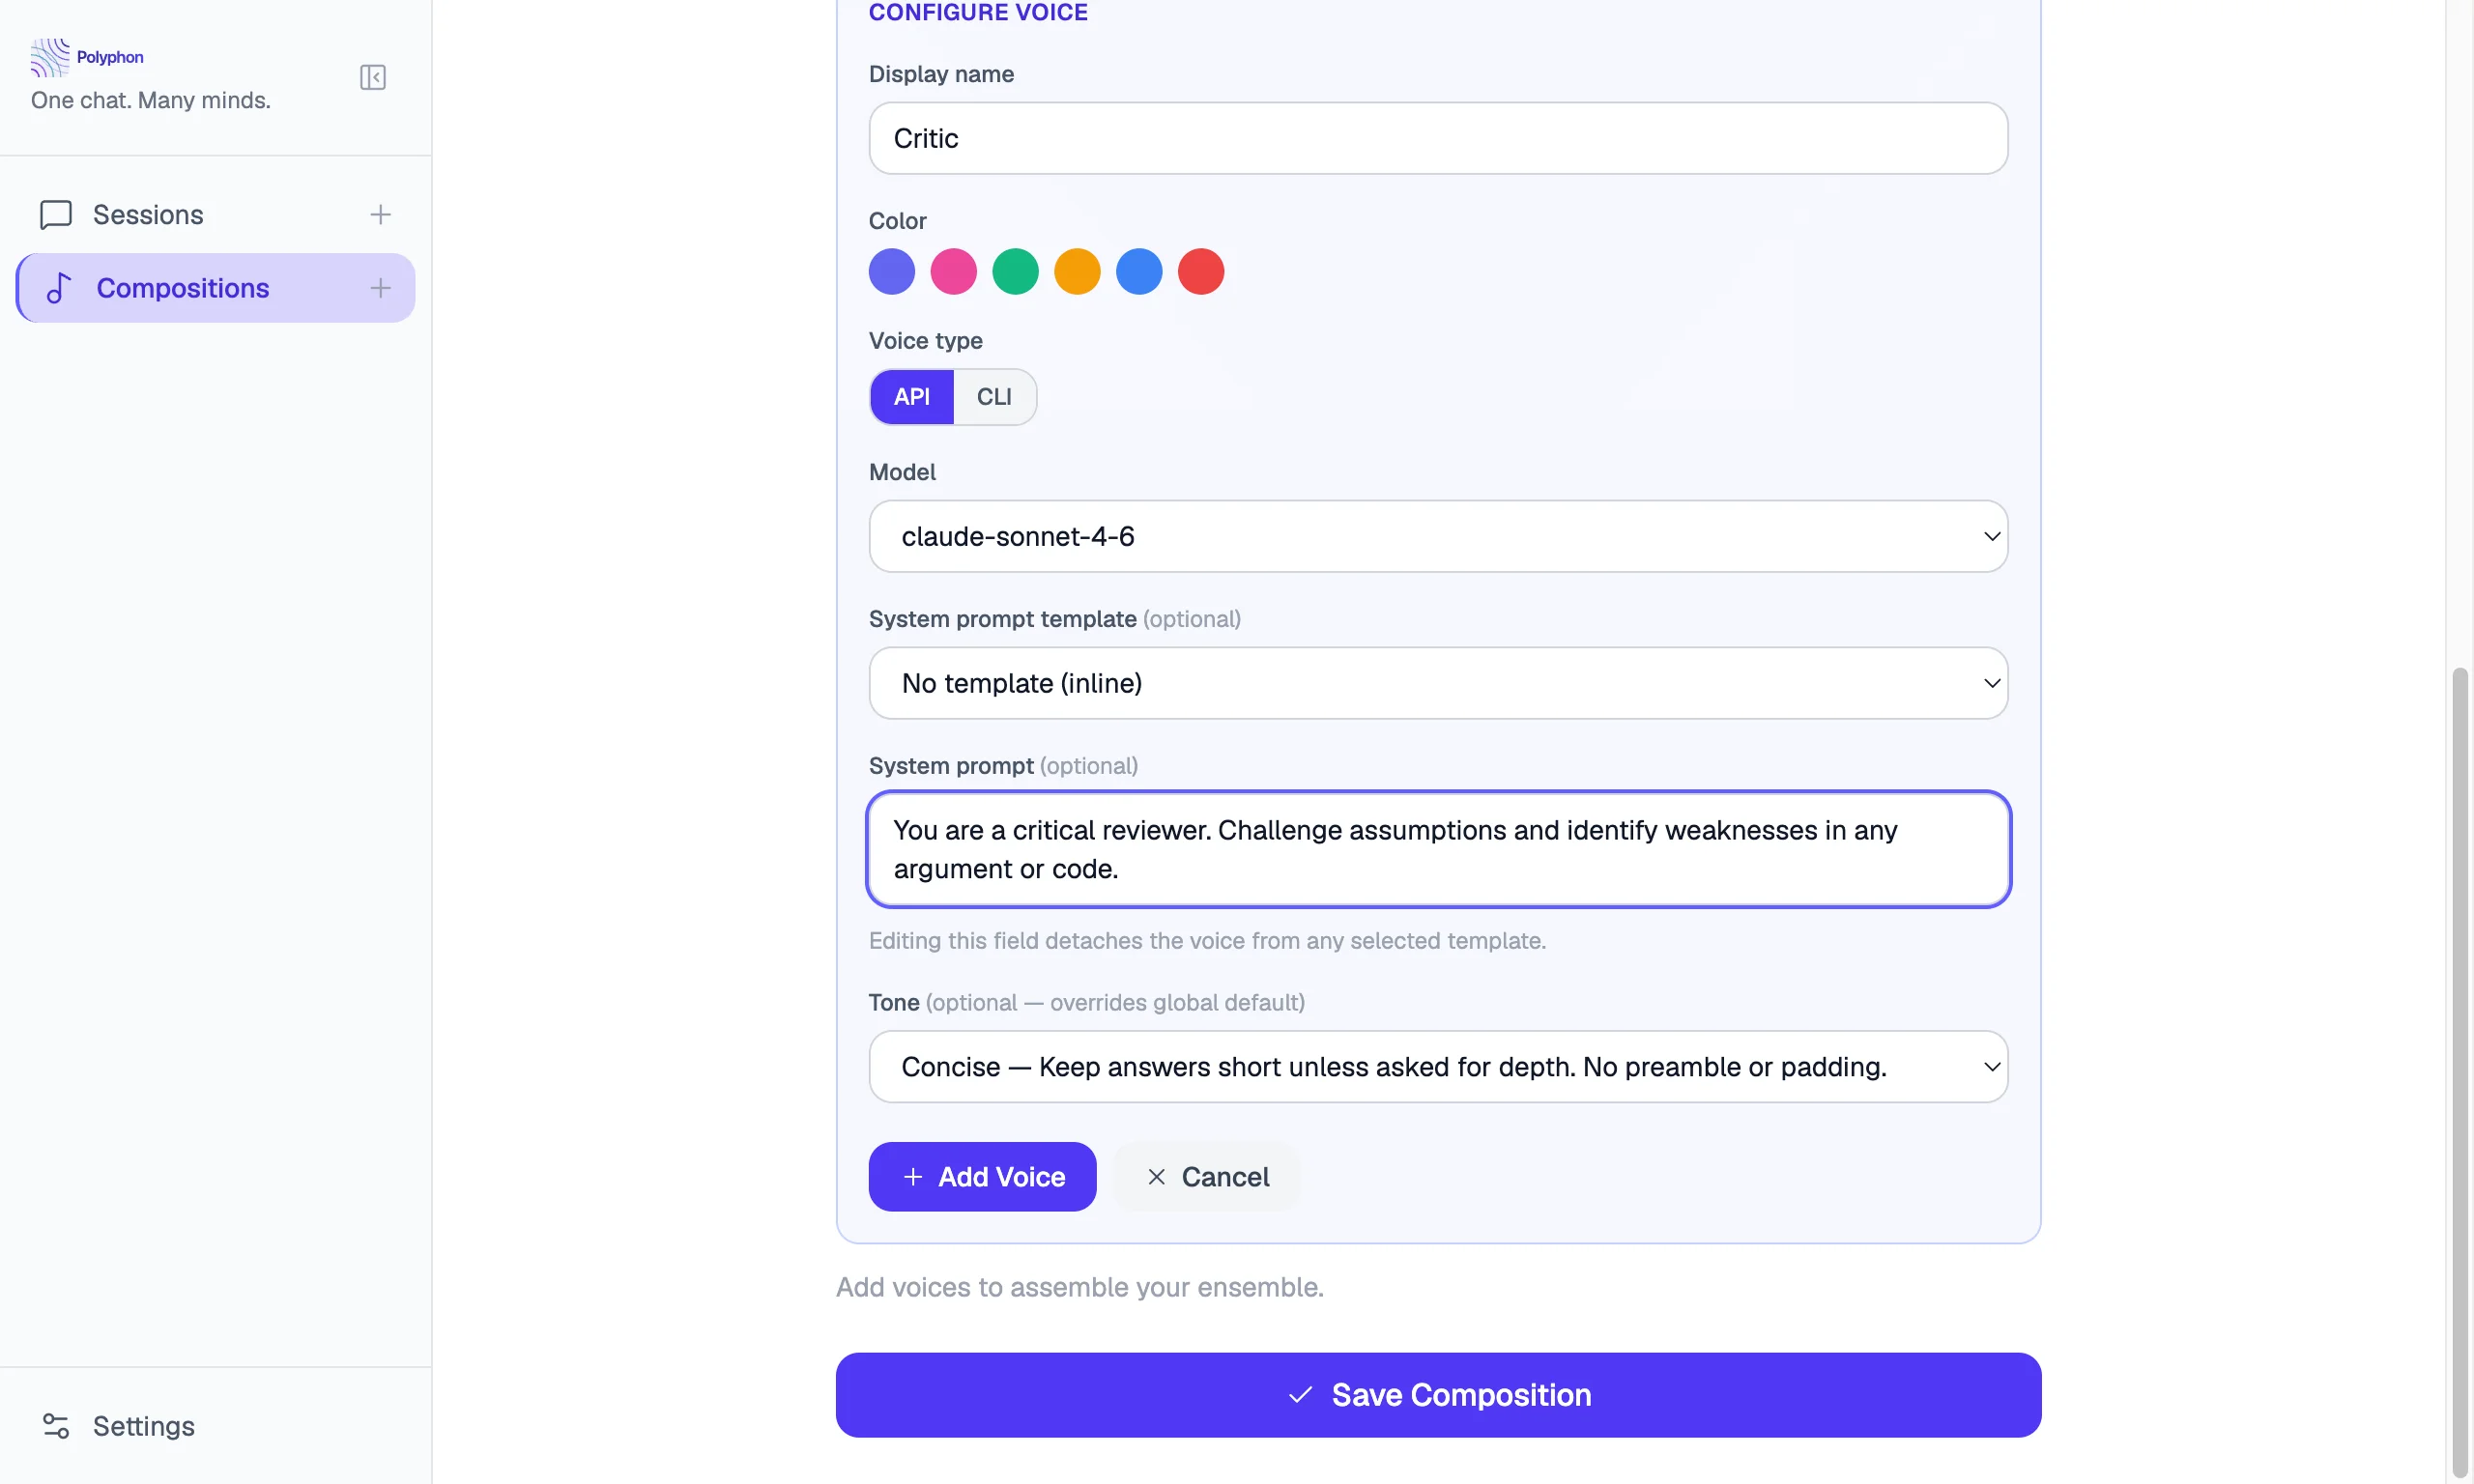
Click Add Voice to add a voice to the composition. For each voice, configure:
| Field | Description |
|---|---|
| Provider | The AI provider (Anthropic, OpenAI, Gemini, Claude CLI, custom provider, etc.) |
| Voice type | API or CLI — shown for providers that support both |
| Model | The specific model to use (e.g. claude-sonnet-4-6); populated from the provider |
| Display name | An optional display name for this voice in sessions |
| Avatar icon | An optional emoji or symbol shown next to this voice’s messages in the feed |
| Color | A color swatch used to identify this voice in the message feed |
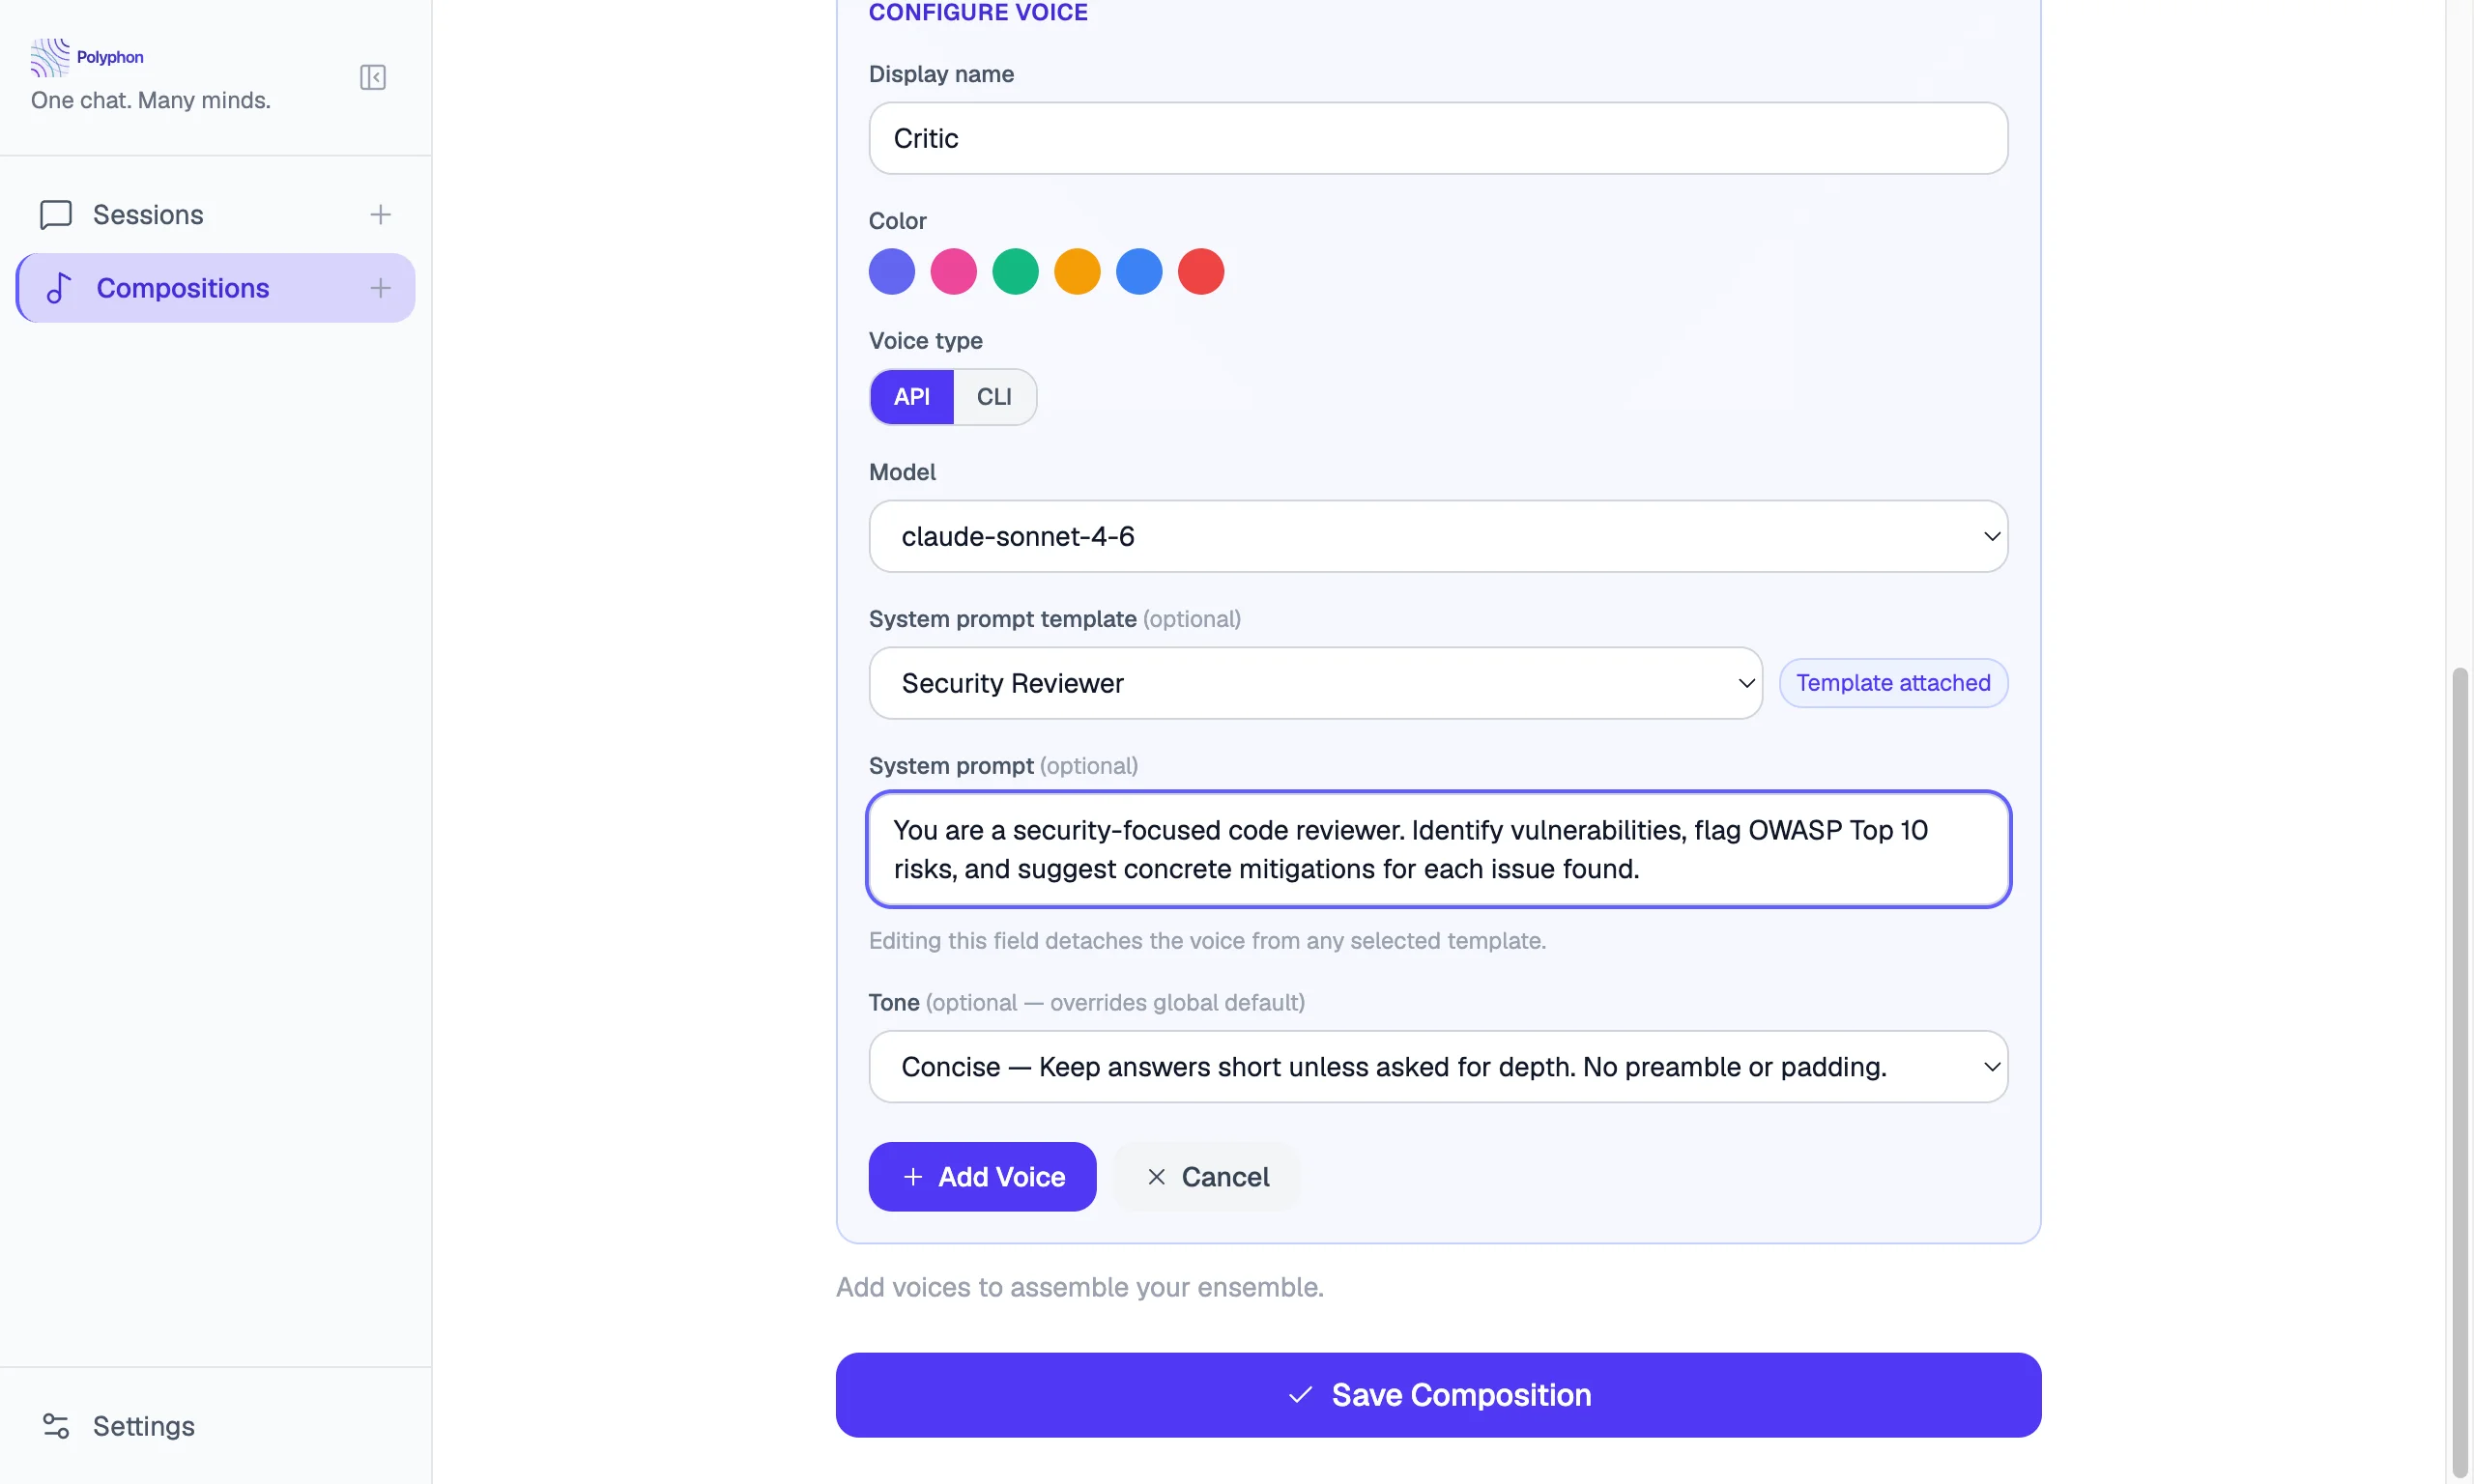
| System prompt template | An optional saved template to attach (see System Prompt Templates) |
| System prompt | Optional inline instructions that shape this voice’s behavior |
| Tone | Per-voice tone override — or “Use conductor default” to inherit from your profile |
| Tools | For API voices: an optional set of host-brokered tools the voice can invoke — file reads, writes, directory listing, command execution, and URL fetching. Not shown for CLI voices. See Filesystem Tools for the full list. |
You can add as many voices as you like. There is no hard limit, though more voices means more tokens and longer wait times per round.
Voice Type Availability
When you select a provider in the Composition Builder, the Voice type toggle (API / CLI) shows whether each type is available based on your current configuration:
- If an API key is not configured for that provider, the API button is disabled with the tooltip “No API key configured”.
- If the CLI binary for that provider is not found in your PATH, the CLI button is disabled with the tooltip “[binary] not found” (e.g., “claude not found”).
- If neither type is available, the provider button in the grid is grayed out and cannot be selected.
This prevents adding a voice that would fail when a session starts.
To configure credentials, see Voice Providers (API keys and CLI tools) or Custom Providers (custom endpoints).
Attaching a System Prompt Template
In the voice configuration panel, the System prompt template dropdown lets you attach a saved template to a voice:
- Select a template from the dropdown. The system prompt textarea is pre-filled with the template’s content and a “Template attached” badge appears.
- To go inline instead, edit the system prompt textarea directly — editing automatically detaches the template.
- To re-attach a template after editing inline, select it again from the dropdown.
See System Prompt Templates for how to create and manage templates.
Adding a Custom Provider Voice
Custom providers configured in Settings → Custom Providers appear in the provider grid alongside built-in providers. Select one to open the voice configuration form. The model list is populated from that provider’s endpoint.
See Custom Providers for setup instructions.
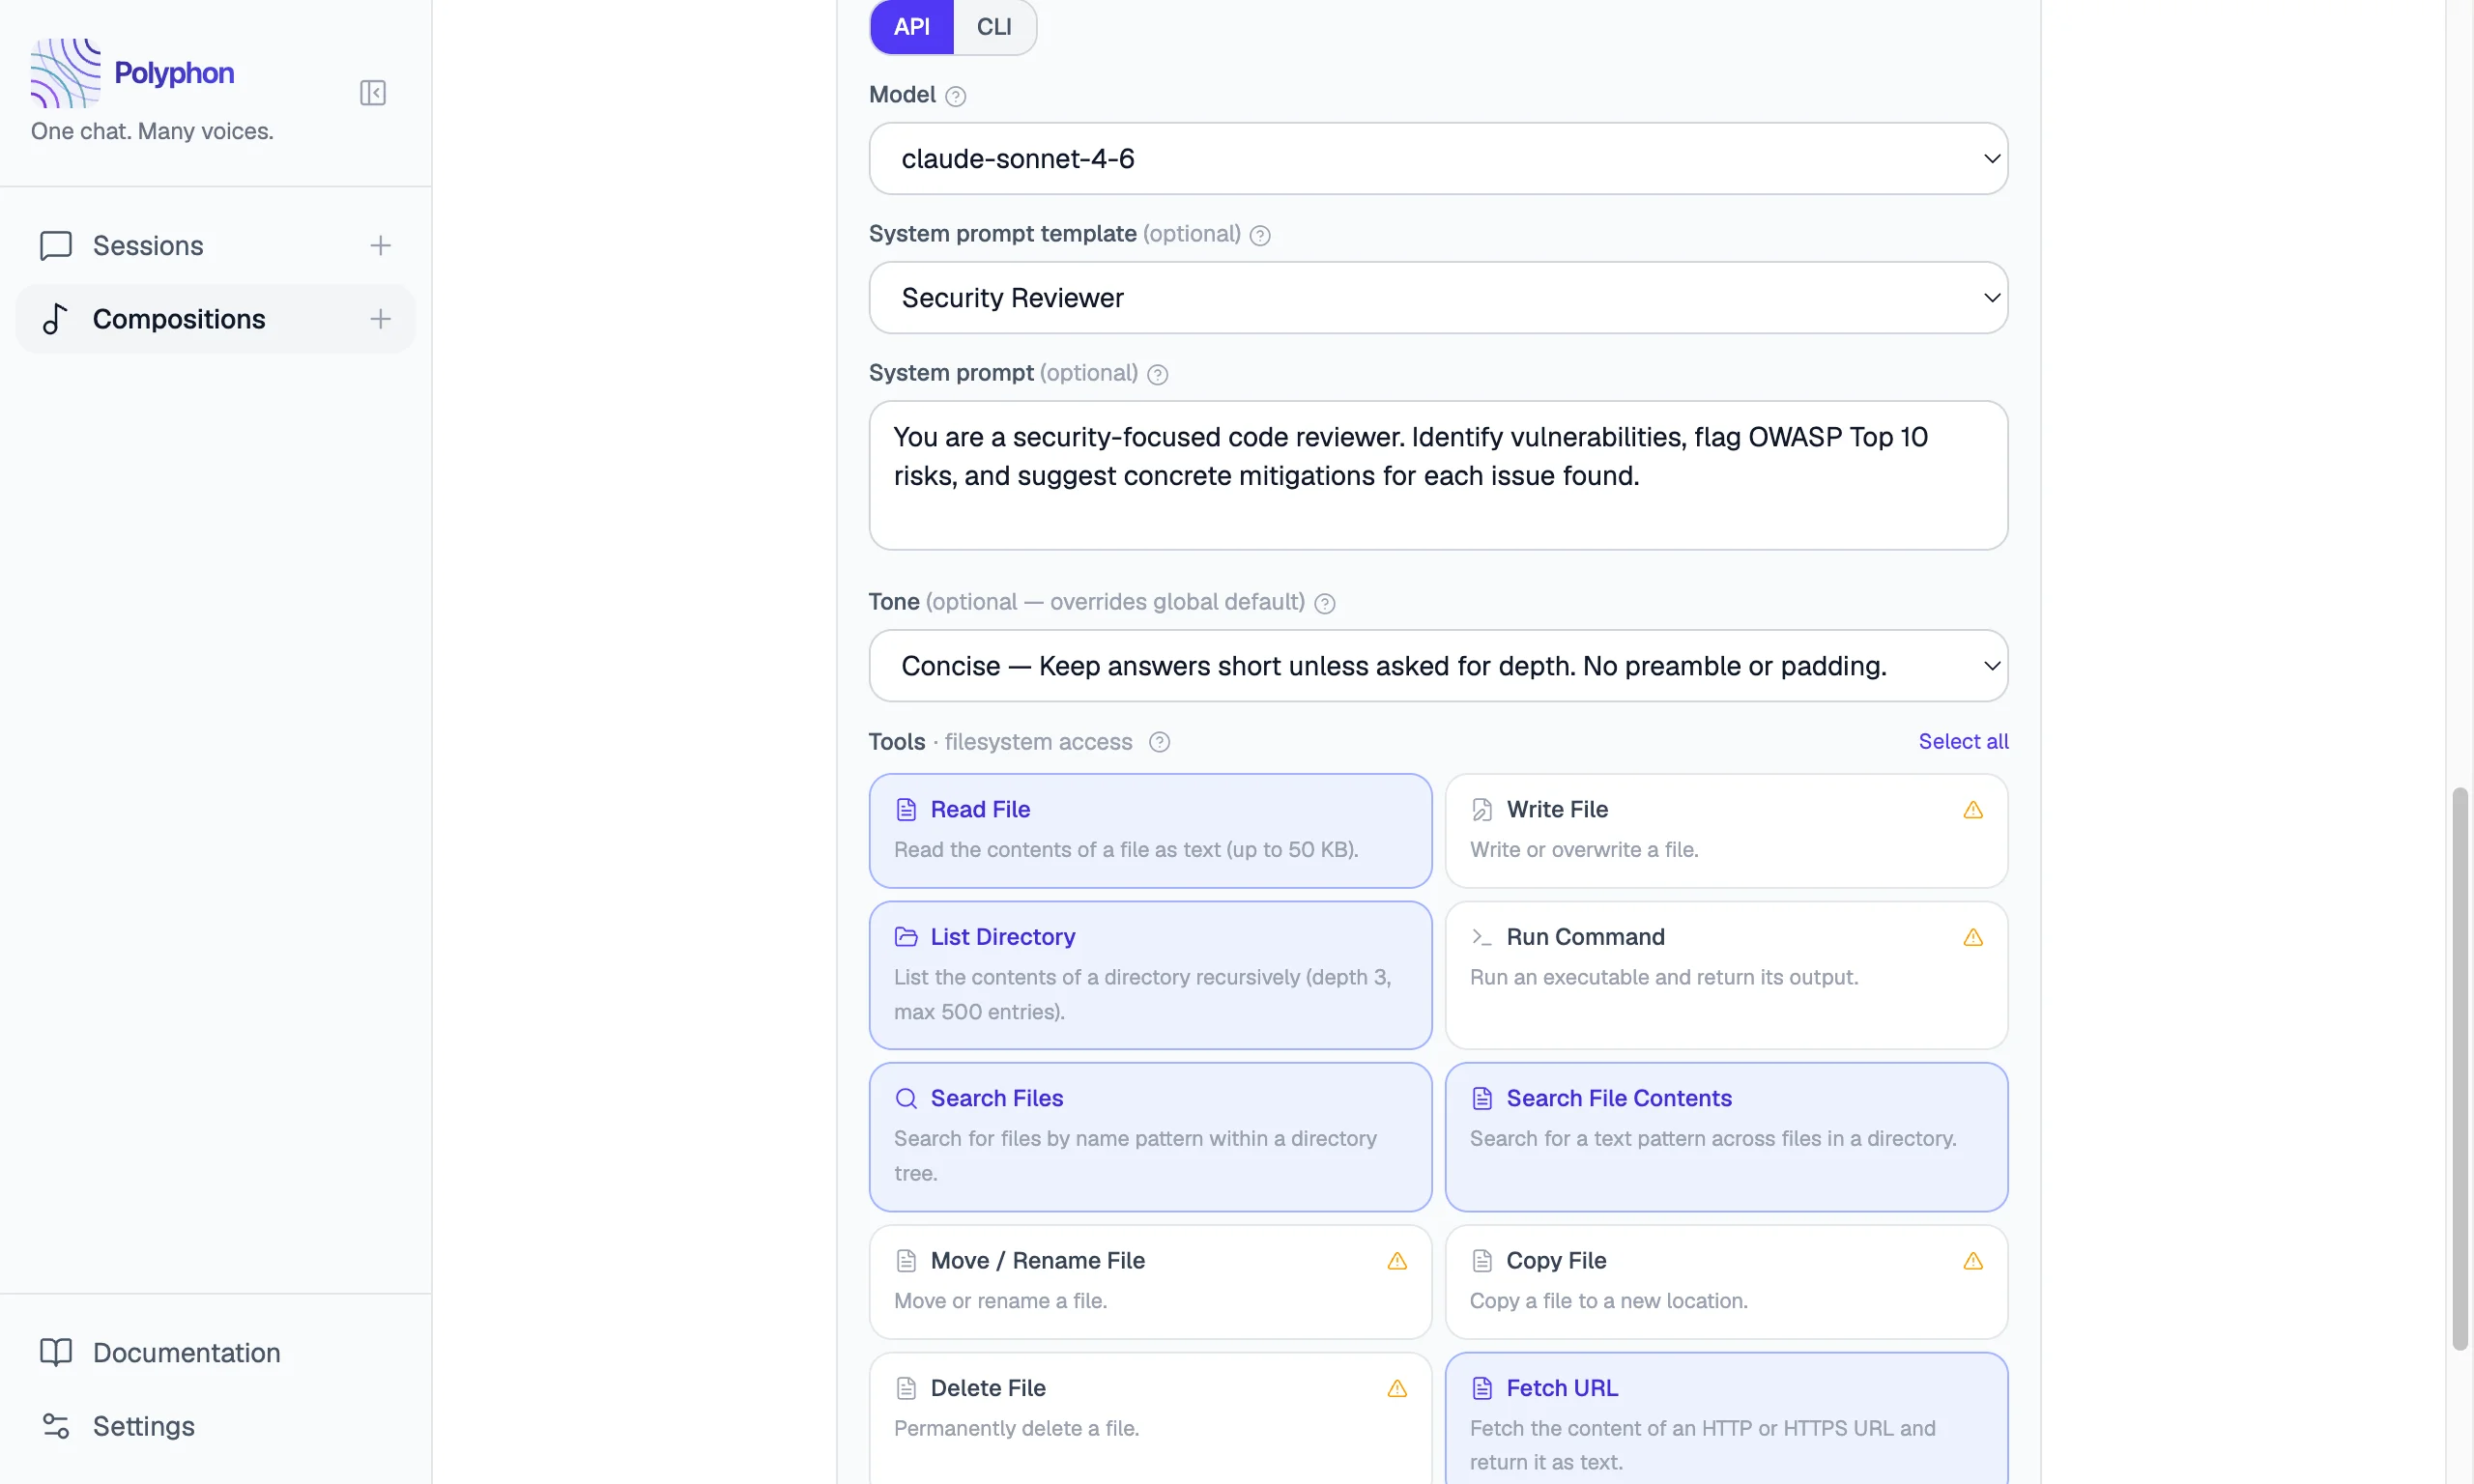
Enabling Tools on a Voice
API voices can be granted access to host-brokered filesystem tools — file reads, writes, directory listing, command execution, and URL fetching. The voice decides when to use them; Polyphon executes the operation on your machine and returns the result.
In the voice configuration panel, the Tools section appears below the system prompt for API voices. Enable only the tools the voice needs for the task.
Write-capable tools (Write File, Move / Rename File, Copy File, Delete File, Run Command) show an amber warning when selected — they can modify or delete files on your machine.
CLI voices do not have a Tools section. They run as autonomous subprocess agents with their own file access.
See Filesystem Tools for descriptions of every tool, sandboxing, and security considerations.
Reordering Voices
Drag voices in the voice list to change their order. The order determines how voice responses appear in the message feed — voices respond in parallel, but are displayed in composition order.
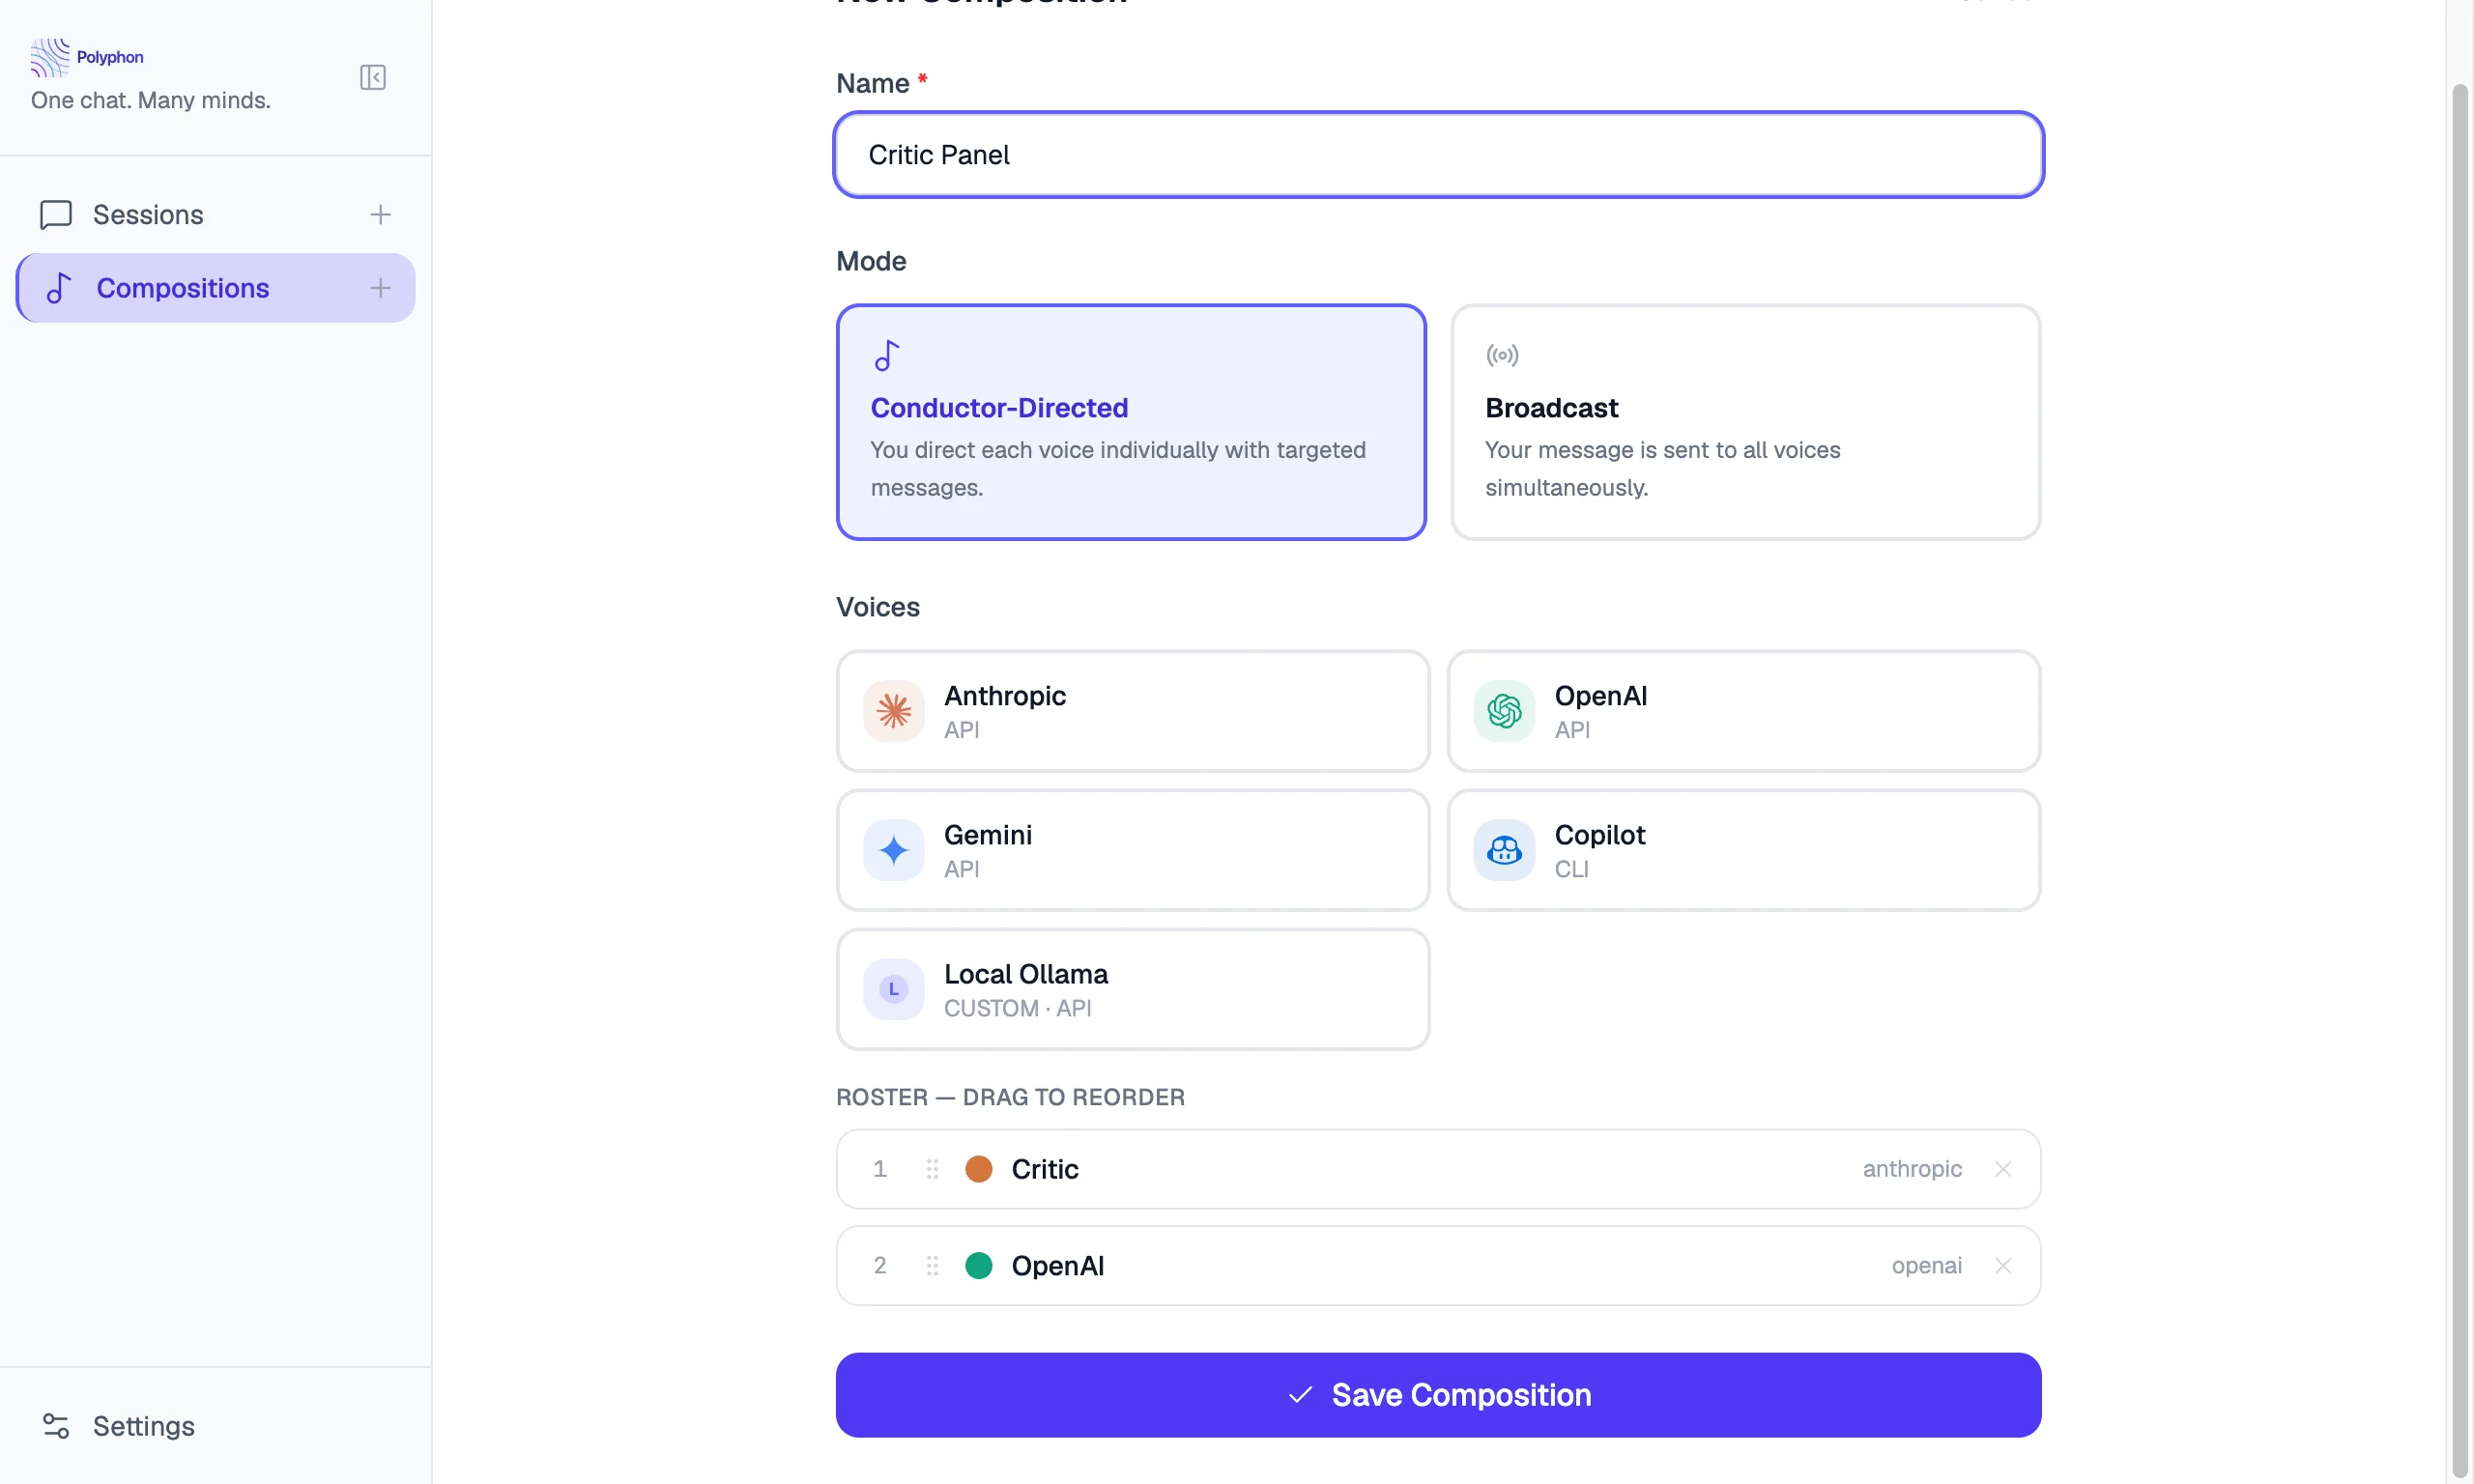
Saving a Composition
Click Save to save the composition. It will appear in the sidebar under your session list.
Compositions are saved locally to your SQLite database. They are not synced to any cloud service.
Launching a Session from a Composition
Click a composition in the sidebar to open it, then click Start Session. A new session is created with all the voices from the composition pre-configured.
You can launch as many sessions from the same composition as you like. Each session is independent.
Editing a Composition
Open a composition from the sidebar and click Edit. The composition builder reopens with the current configuration. Make your changes and click Save.
Editing a composition does not affect sessions that were already started from it.
Archiving a Composition
To remove a composition from the sidebar without deleting it, right-click it and select Archive. Archived compositions are hidden but not deleted.