This guide walks you through downloading, installing, and launching Polyphon for the first time.
Requirements
- macOS 13+, Windows 10+, or Linux (x64 or arm64)
- At least one voice provider configured — either an API key or a supported CLI tool in your
PATH
Download
Download the latest release for your platform from the GitHub Releases page.
| Platform | File |
|---|---|
| macOS (Apple Silicon) | Polyphon-*-arm64.dmg |
| macOS (Intel) | Polyphon-*-x64.dmg |
| Windows | Polyphon-*-Setup.exe |
| Linux | Polyphon-*.AppImage |
Install
macOS
- Open the
.dmgfile. - Drag Polyphon to your Applications folder.
- On first launch, macOS may show a security prompt — click Open Anyway in System Settings → Privacy & Security.
Screenshot placeholder: macOS DMG window with Polyphon being dragged to Applications
Windows
Run the installer (.exe) and follow the setup wizard. Polyphon will be added to your Start menu.
Linux
Make the AppImage executable and run it:
chmod +x Polyphon-*.AppImage
./Polyphon-*.AppImage
First Launch
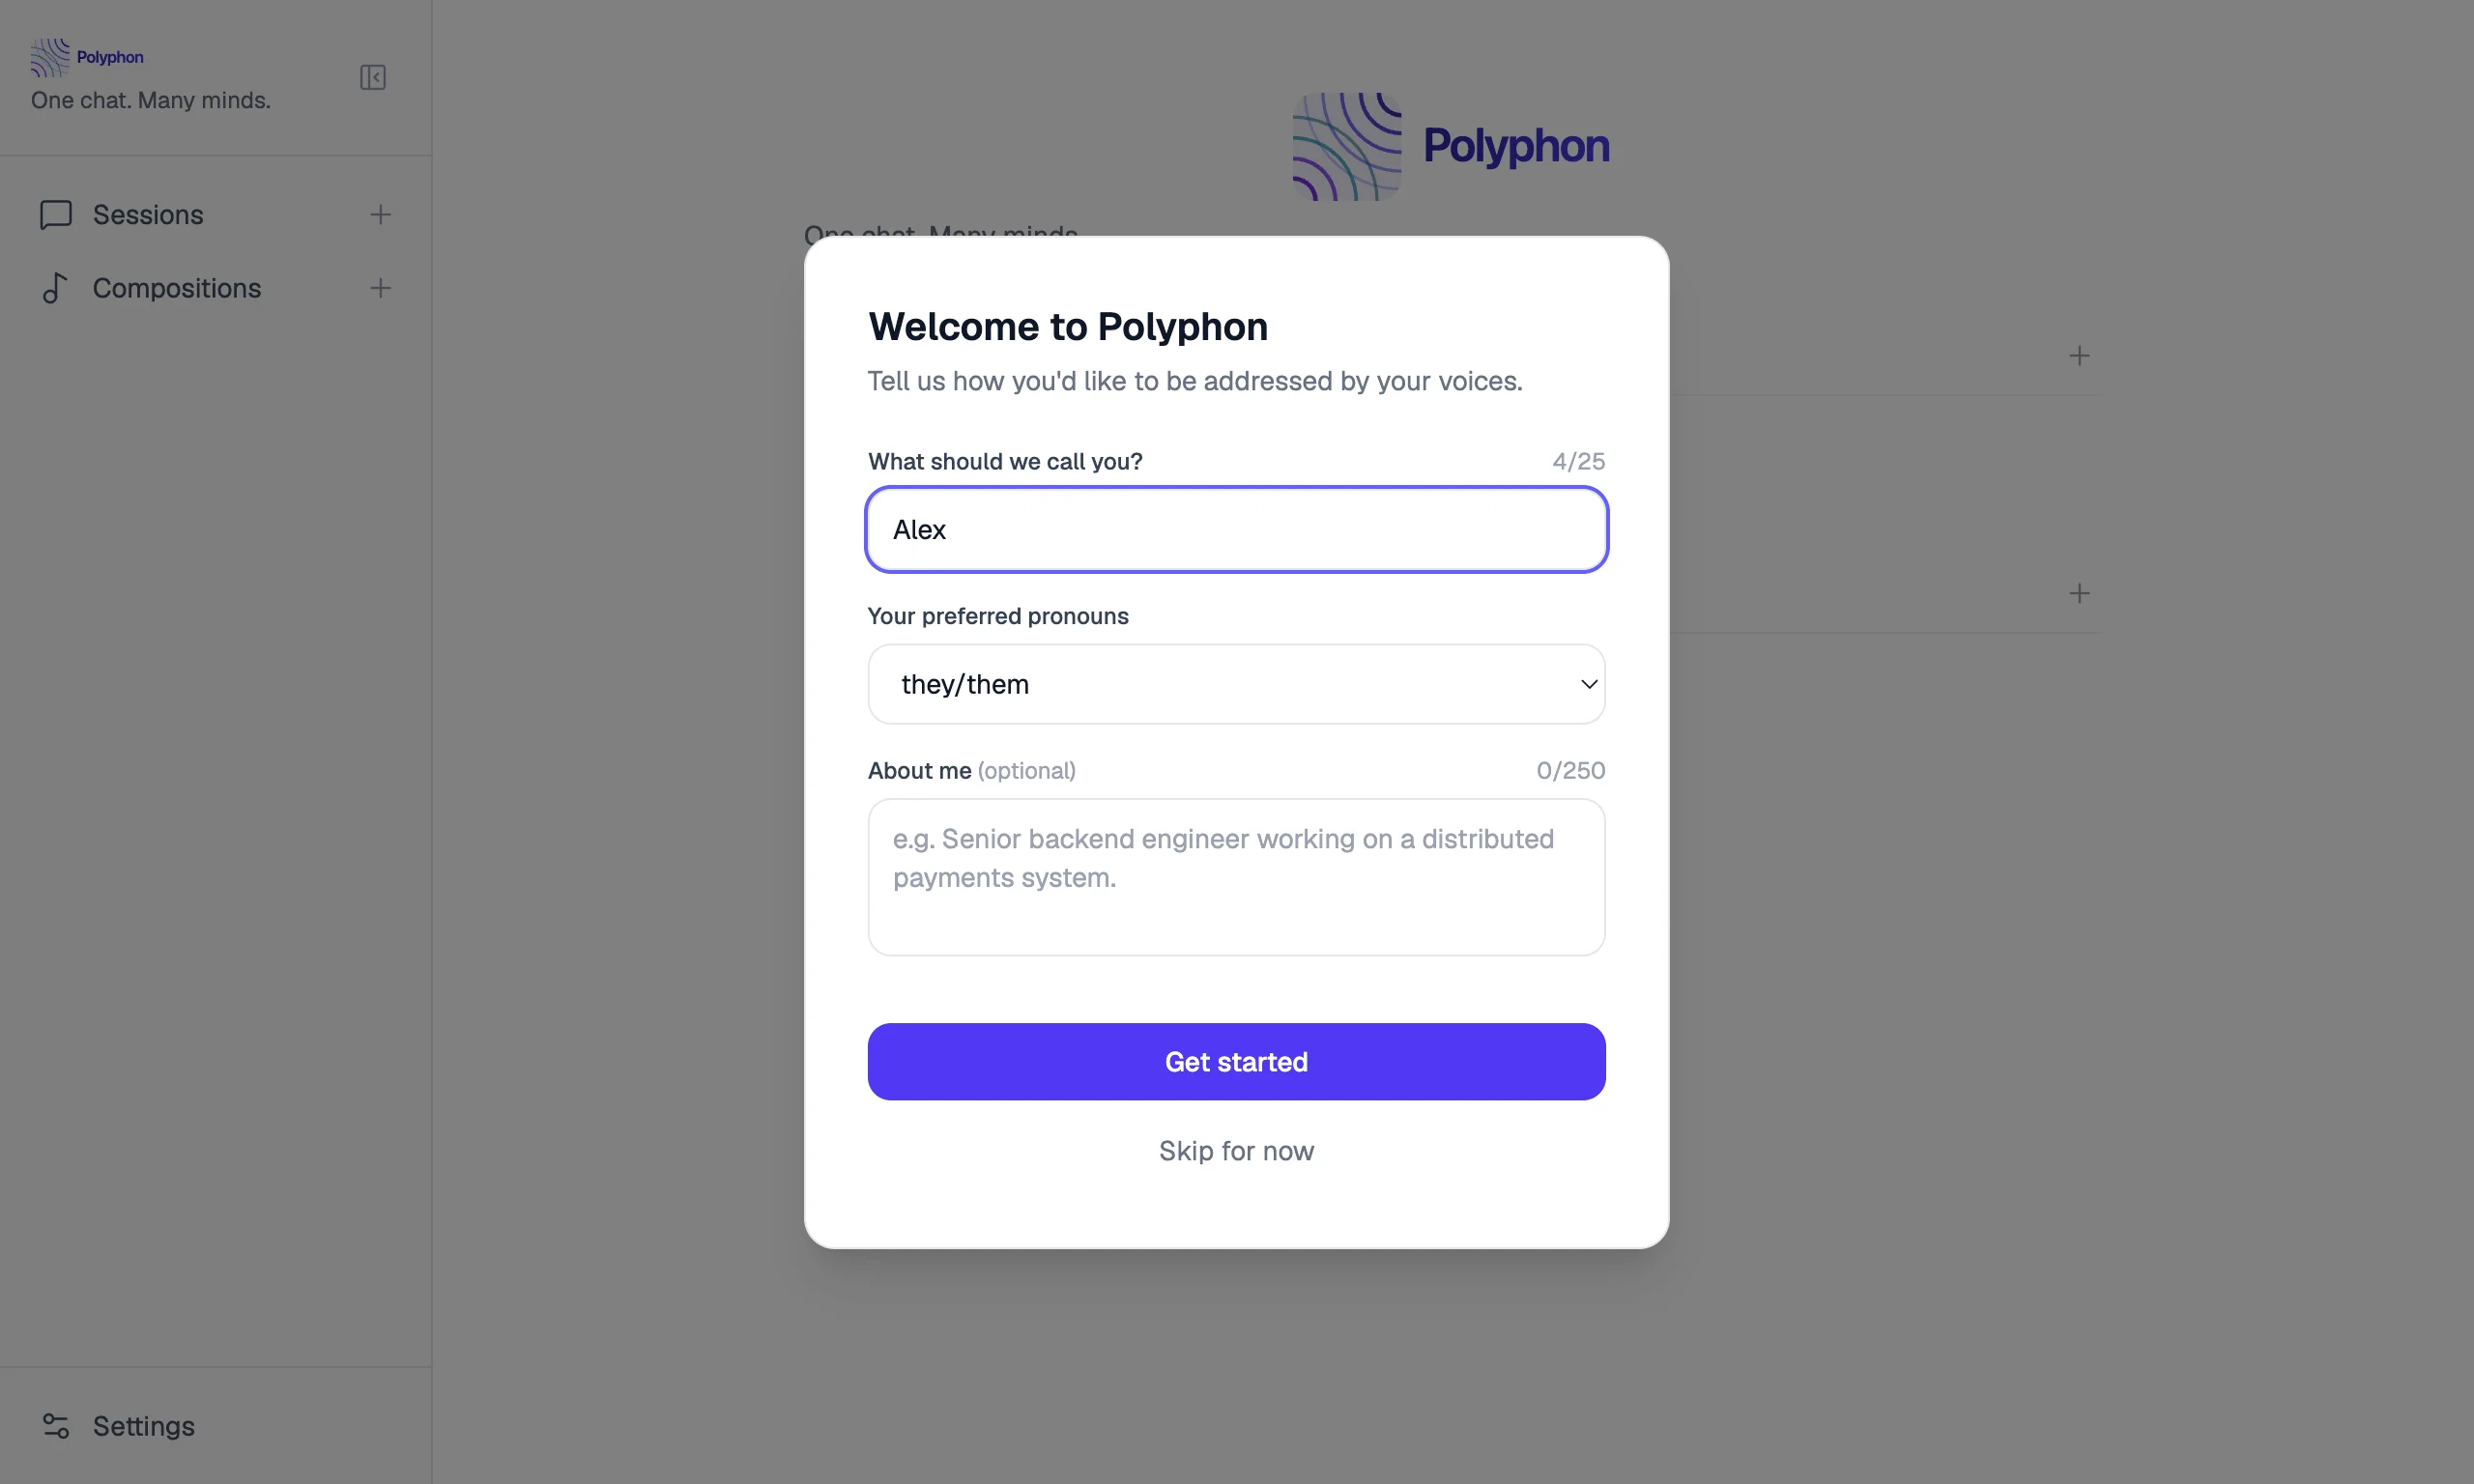
When you open Polyphon for the first time, a welcome dialog appears asking for your name and pronouns. This lets voices address you the way you prefer. Enter a name and click Get started — or click Skip for now to configure it later in Settings → Conductor Profile.
After the welcome dialog, you will see the main window with an empty sidebar. Before starting your first session, you need at least one voice provider configured. Go to Settings (gear icon in the bottom-left corner) and add your first provider.
See Voice Providers for step-by-step instructions.
Build from Source
If you prefer to build Polyphon yourself:
git clone https://github.com/coreydaley/polyphon.git
cd polyphon
npm install
make dev        # run in development mode
make build      # build a production binary
Requires Node.js 22+ and npm.